
When I was searching for a car to replace my E46 325i problem child, I had my mind set on an E90. I’ve always loved the design, felt the cabin was modern enough to not feel old, and I honestly wanted to try out the N52 engine, after hearing so many good things about it on forums. While doing my research on N52 engines, and E90s in general—their reliability, maintenance, tips and tricks, and just overall owners’ opinions—there were a few things I knew I need to get done as soon as I bought one. So here are the few things I learned, what I did to my car so far, and what the process was like.
The BMW N52 seems like one of the brand’s all-time greats, if I’m being honest. For one thing, I love using it. It’s underpowered by today’s standards, especially in my 2006 325i (the weakest E90), which only has 215 horsepower. However, it’s so silky smooth and its power delivery is so linear and responsive that I always enjoy revving it out. It helps that the clockfaces on its gauges are among the best every fitted to a BMW (E92 M3 gauges are best). It’s also a pretty reliable engine (knock on wood) and shockingly easy to work on so far.
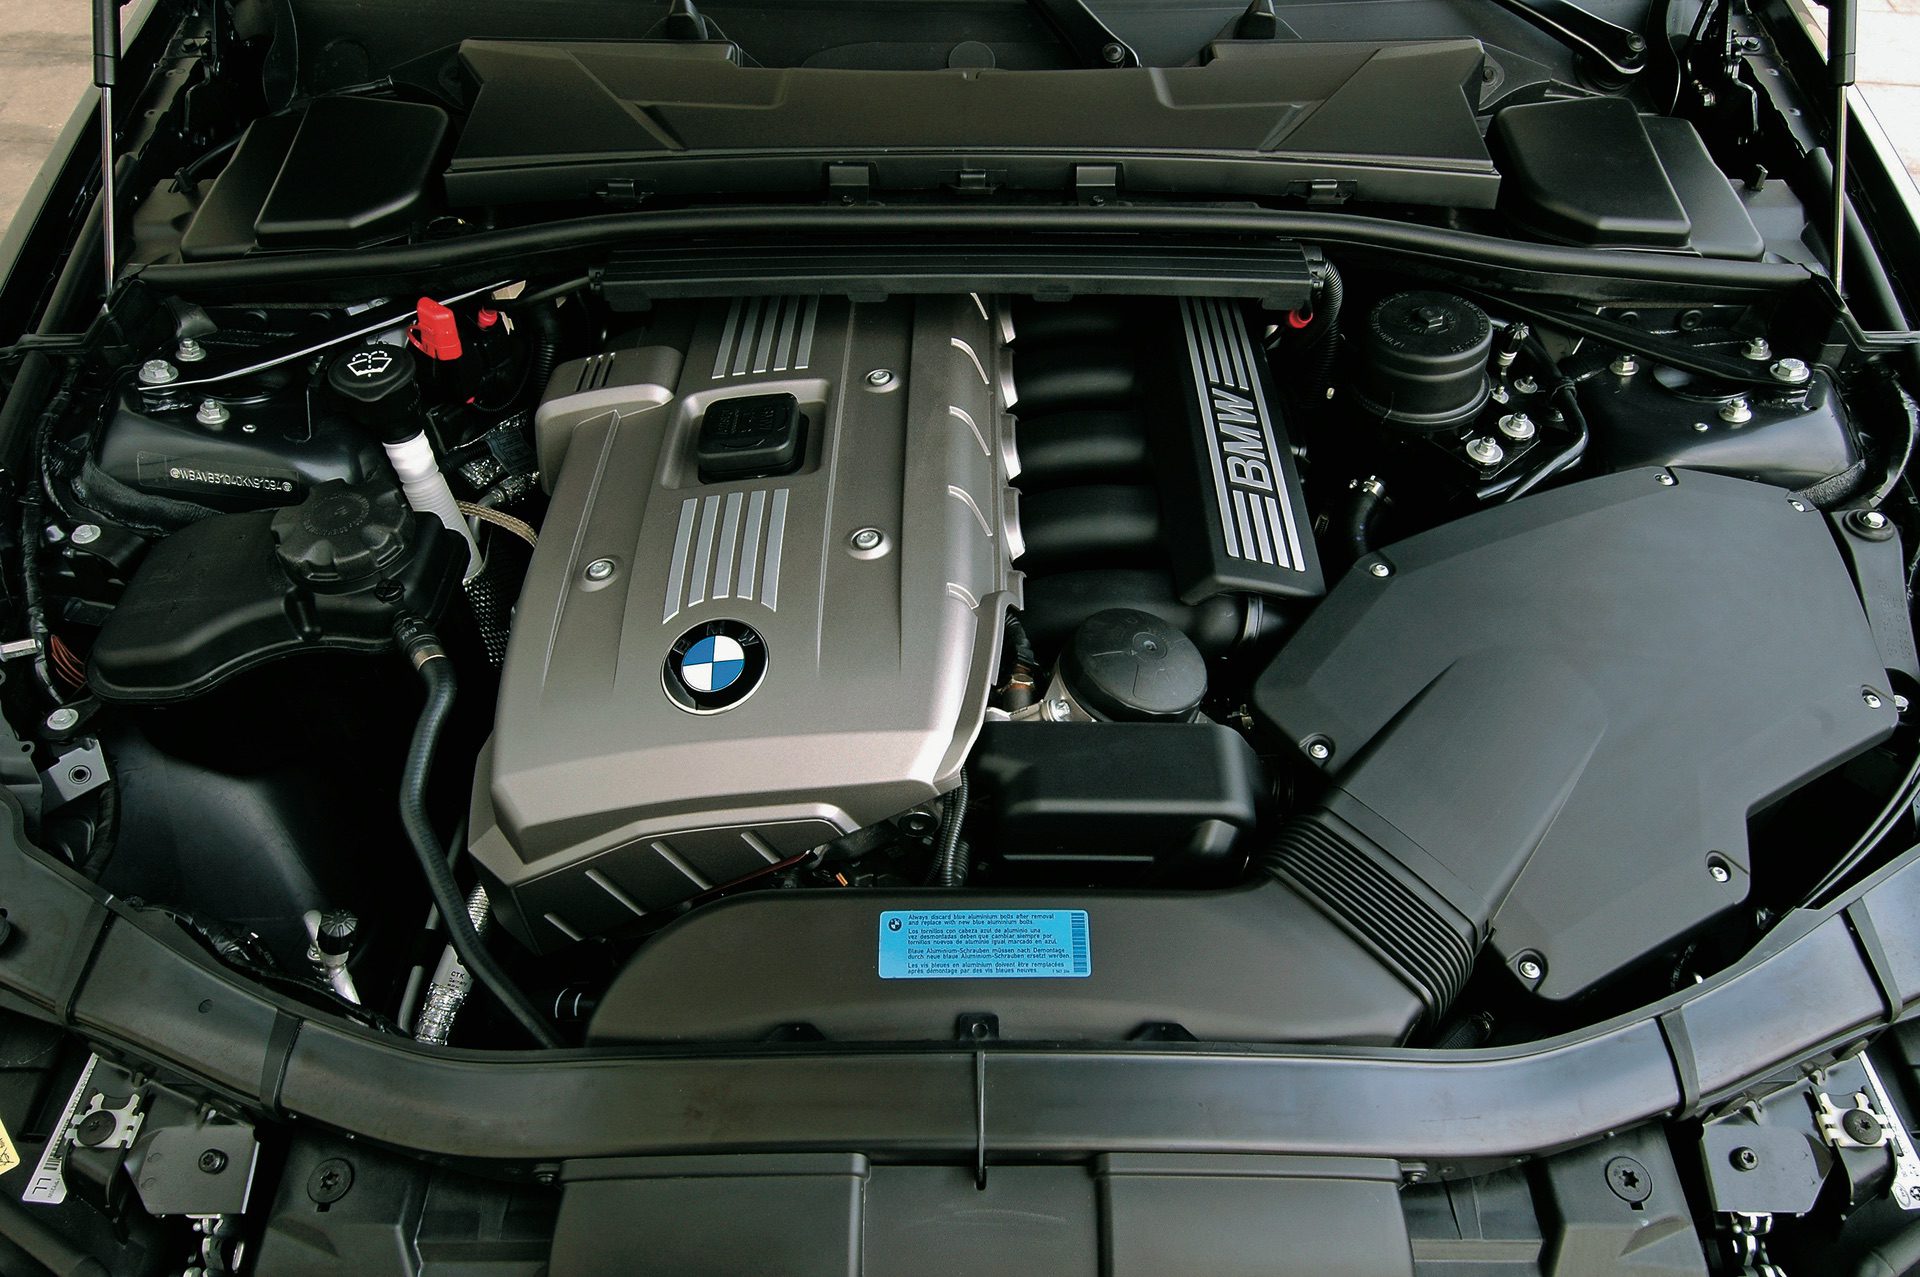
However, there are a few maintenance items it requires that cannot be neglected. The first of which is the oil filter housing gasket, which is literally a gasket that seals the top of the oil filter housing to the cylinder head. If you don’t change the gasket, it gets hard and loses its seal, which then allows oil to drip directly only the serpentine belt (as well as everywhere else, the front of my engine was a mess due to a neglected gasket). If oil continuously leaks on the belt, it can cause that belt to swell, crack, and break, which can be disastrous.
Another really important bit of maintenance is replacing the coolant flange (nicknamed “Mickey Mouse flange” due to its shape). Essentially, it’s a small flange that connects a coolant hose to the front of the cylinder head and the stock flange’s neck is made from plastic. After many years and many miles, that plastic neck breaks and, when it does, will dump all of your coolant onto the road, causing your car to immediately overheat. It will show signs of leakage first, though, and when it does leak it drips its coolant onto the serpentine belt, again causing potential issues.
Because both of those issues can damage the serpentine belt, it’s also good to replace the belt and its pulleys, as the entire belt/pulley kit is relatively affordable and very easy to do. If you’re an E90 (or E91, E92, E93) owner with an N52 engine (325i, 330i, 328i) and you haven’t done these things, maybe this article can help you out.
Here’s What You’ll Need:
- Oil Filter Housing Gasket Kit
- Coolant Flange/Hose/Clamp
- Serpentine Belt
- Tensioner Pulley
- Idler Pulley
- Socket Set
- Socket Wrench
- E-Torx Socket Set
- 1/4-inch E10 Swivel Socket with 6-inch Extension (or longer)
- T60 Socket
- 1/2-inch Breaker Bar
- 7 Quarts of Oil
- 1 Gallon of BMW Coolant
- 1 Gallon of Distilled Water
- Torque Wrenches Highly Recommended
The first thing I did was drain the oil and the coolant. Make sure to get some catch pans ready or you’re gonna make a huge mess. The oil pan has a drain bolt on the bottom, underneath the engine, I just unbolted it and let the oil flow into a pan. Underneath the radiator, on one side or the other (depending on the model), there’s a big screw with a giant “+” shape head. I used an enormous flathead screwdriver (but a quarter and pliers work well too), as a regular screwdriver will damage the plastic head. I unscrewed it and let the coolant flow into a pan. Obviously, I did this with the engine cold, or both fluids would have been very hot.
After that, I removed the oil filter, to help the oil drain from the pan. Once the fluids were draining, I took the air intake box and duct out, to give me better access. Then, once all the fluids were done, I screwed the oil pan and radiator drain plugs back in and got to work.

The first thing I did was take the serpentine belt off, by using a T60 socket on a 1/2-inch, 15-inch long breaker bar to release the belt tension on the tensioner pulley. After the belt was off, I removed both pulleys, which were held on by one bolt each. Super easy stuff. Once they pulleys were off, I got to work on the oil filter housing gasket. This is the only tricky part of the whole job. It’s held on by three E-torx bolts (external torx), which is why you need the E-torx socket set. However, one of the bolts is tricky to get to and the best way to do it is to use an E10 swivel socket on a long 1/4-inch extension and sneak it between the oil filter housing and intake manifold. Once you do that, it’s actually super easy.
Once those bolts were removed and the housing was off, I sprayed some brake cleaner paper towel and cleaned the cylinder head, where it meets the housing, as it was grimy. Then I replaced the gasket in the housing, which can be annoying if you don’t have any picks, which I don’t. So I used a razer utility knife, carefully sliced the gasket, and used my smallest flathead screwdriver to dig into the slice, pick one end up, and pull the rest out. Then I replaced it with the new gasket, which was obviously super easy.
After that, I cleaned up the housing with some brake cleaner, dried it off, and reinstalled it. Once you get a feel for that one tricky bolt, it’s easy to get it back on. However, I highly recommend using a torque wrench to reinstall any of the bolts on this engine, as they’re all aluminum bolts. The cylinder head is an aluminum/magnesium alloy, so the bolts need to be aluminum and they can easily break. They’re all also one-time-use bolts and the new parts should come with new bolts. So make sure they’re torqued to the proper spec. I don’t have torque wrenches but thankfully I’ve become good at getting a feel for how tight I can go before breaking bolts. Ask me how I learned the hard way … I’d rather use torque wrenches, I’m just cheap.
Once the oil filter housing was back on, I started on the coolant flange which, if you buy the right kit, is super easy. Only two 10mm bolts hold it on and they’re easy to get to. I unbolted those and gently wiggled the flange out of the cylinder head. I used a small flathead to gently pry it away because you don’t want to break the plastic neck off, so as to not get plastic bits in your coolant system. Once out, I actually just found the other end of the hose, which is attached to the water pump near the bottom of the engine, and disconnected it, because my kit came with a new flange attached to a new hose already.
The reason for that is that the stock hose clamp is a compression fitting and can’t be removed. So rather than fight the fighting and breaking it off, which is tough to do without damaging the hose, I just reinstalled an entirely new flange and hose in one shot. Nice and easy.

After that, it was time to put the serpentine belt back on and fill the car back up with fluids. So I filled it up with Liqui Moly’s Leichtlauf 5W40 fully synthetic motor oil, which is my favorite oil for high-mileage German engines. Then, I made a 50/50 mixture of BMW’s blue coolant with distilled water (one gallon of each, makes two gallons of mixed coolant), and filled it up. Then I reinstalled the air intake and did my absolute favorite part of the job: bleeding the air.
In older BMWs, bleeding the air from the coolant lines was a flipping nightmare. I wanted to drive my E36 into a river when doing it. However, because the E90 (and all newer BMWs) has an electronic water pump, the car will do it for you. Just tighten the cap up, get inside the car, press the start button without your foot on the brake (accessory), turn the heat to full and fan speed to low, and then press the gas pedal to the floor for about 12-15 seconds. That little sequence initializes the bleed procedure and you’ll hear the water pump kick on and start bleeding the air. It takes about 10-15 minutes but it will stop itself when it’s done.. I had a beer while I waited. It was brilliant.
All in, I spent about four hours, including jacking the car up, getting all my tools out, and cleaning up at the end. I also took my sweet ass time and didn’t rush, so it could probably be done quicker. Now, though, my engine feels noticeably smoother, likely thanks to fresh oil (I have no idea what the previous owner put in and when he did it) cleaning up the valve lifters, and the new pulleys and belt having no slack. Also, the subtle drone from the old pulleys is gone and the engine sounds brand new.

None of those jobs were difficult, everything was easy to reach, take off, and reinstall, and the total cost was under $300, even after buying the E-torx socket set, swivel socket, and fluids. There are a few more things that need to be done on my car, but I’ll discuss them in another story. For now, if you have an E90, those jobs can be done in one sitting, for a relatively low cost, without a ton of mechanical expertise, and they’ll help your N52 engine run better, free from the dangers of leaking coolant and oil. If you’re looking to buy an E90 with an N52 engine, factor these jobs into your initial maintenance cost and have them done right away.
Of course, you can always buy a BMW Extended Warranty which could offset some of these costs.
![]()
![]()