Washing your car is one thing. You’ve either done it yourself or taken your car somewhere to get it done. It’s the basic necessity of cleaning off the dirt on the outside and vacuuming the inside. However, detailing your car is a completely different thing. You may have thought of the terms as a synonym, a common mistake many have made. The difference is mainly in the “details”.
There’s a personal gratification and even a financial gain when your car gets detailed. The personal gratification is obvious; everyone feels good about having a clean car. The financial gain comes when it’s time to trade up your car. If you follow a regular detailing and wash schedule, your car will be in better condition than it would be otherwise, and you’ll get much more in return for it.
There are different stages when it comes to washing and detailing your car. Allow us to outline them real quickly before we get more in depth.
- Washing Your Car: Wash the exterior of your car once or twice a month to rid the surface of dirt and other contaminants. At the same time, vacuum, dust, and spot clean the interior.
- Maintenance Detail: A maintenance detail can be done every 6-12 months. This involves washing the exterior and reapplying a sealant. At the same time a deep thorough cleaning of the interior and reapplying conditioners and protectants to the various surfaces.
- Corrective Detail: A corrective detail is done on an as needed basis. On average it is done about every 18-36 months. This involves correcting imperfections in the paint and a deep thorough cleaning and repair of interior surfaces.
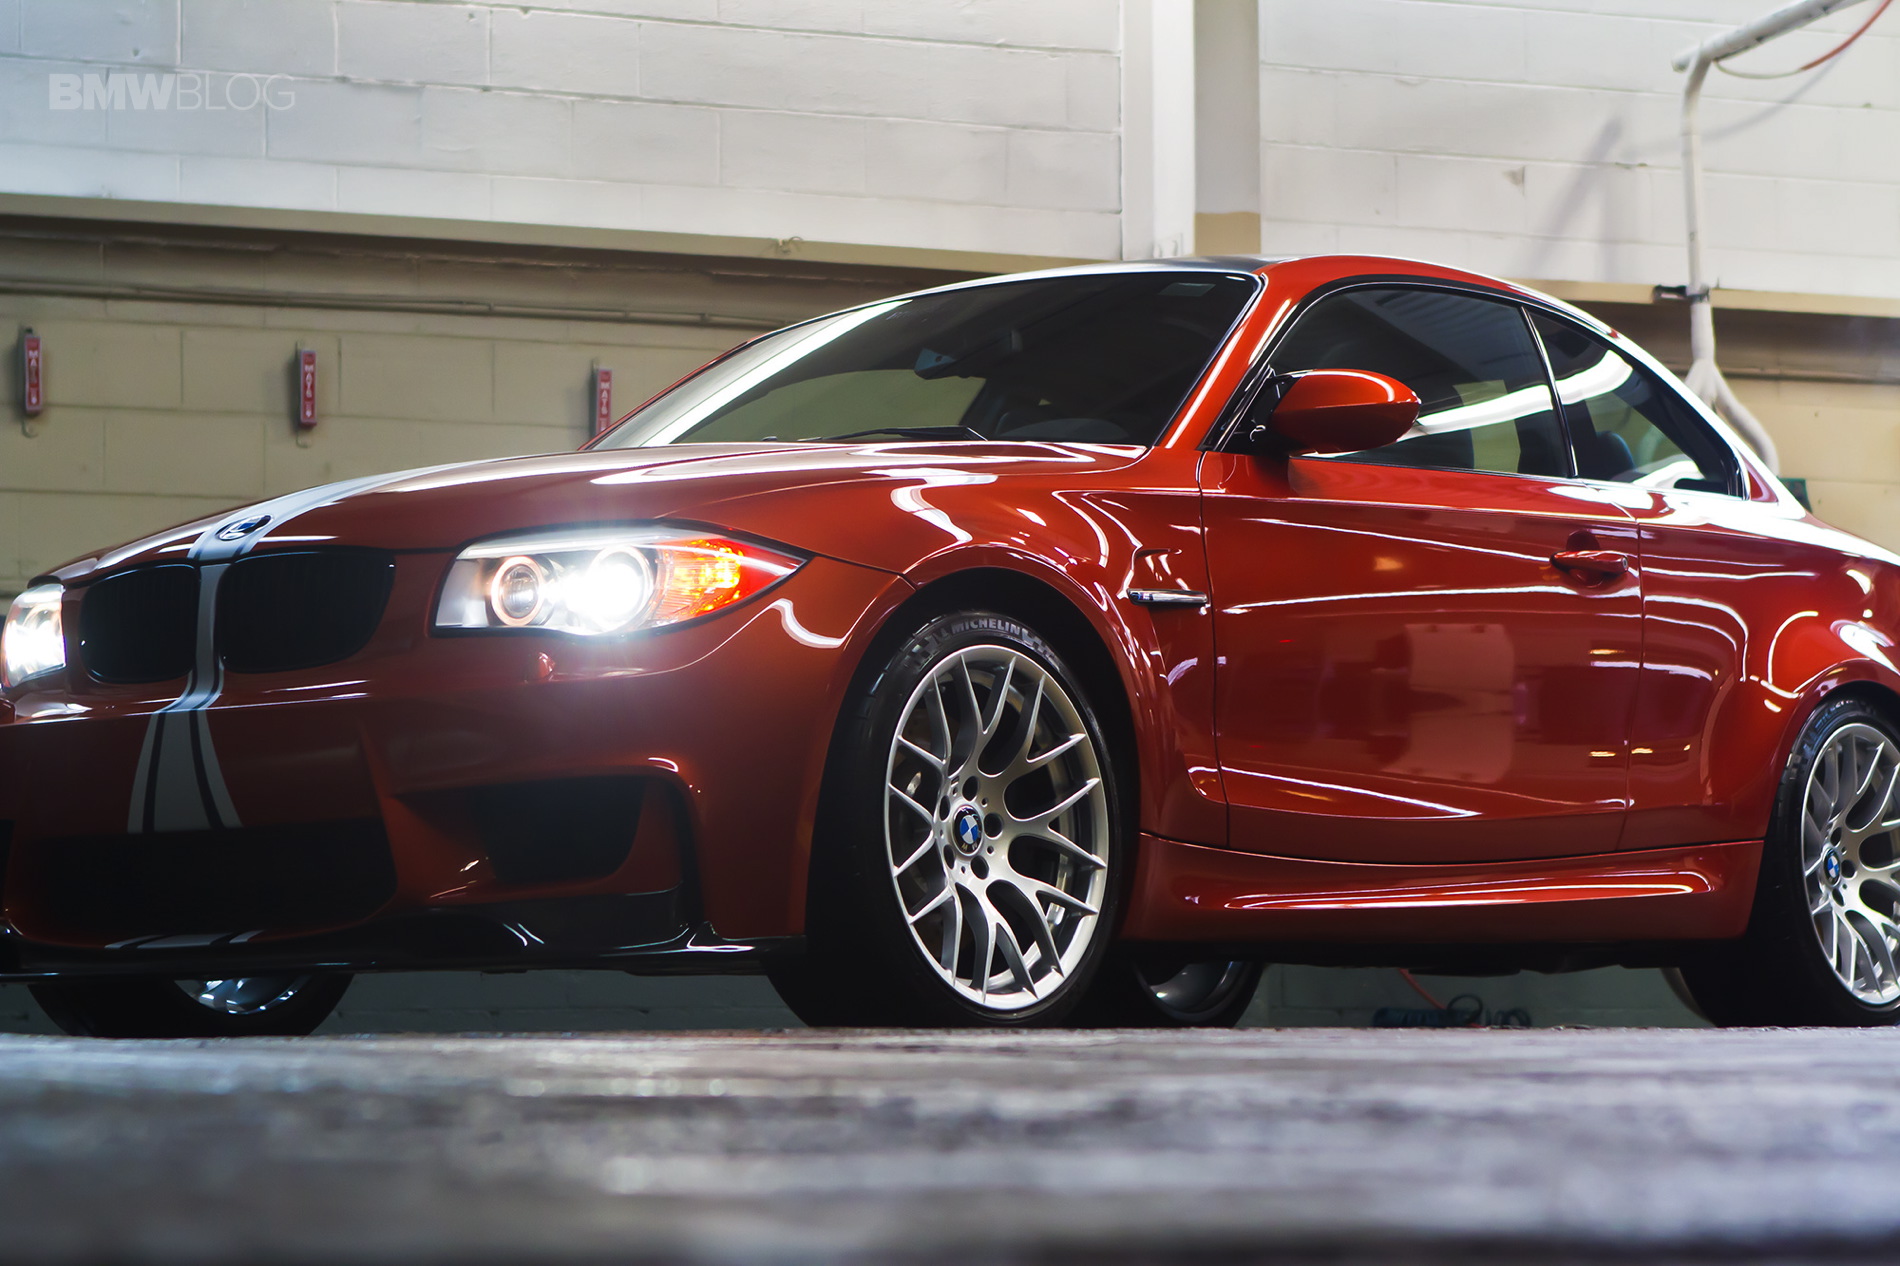
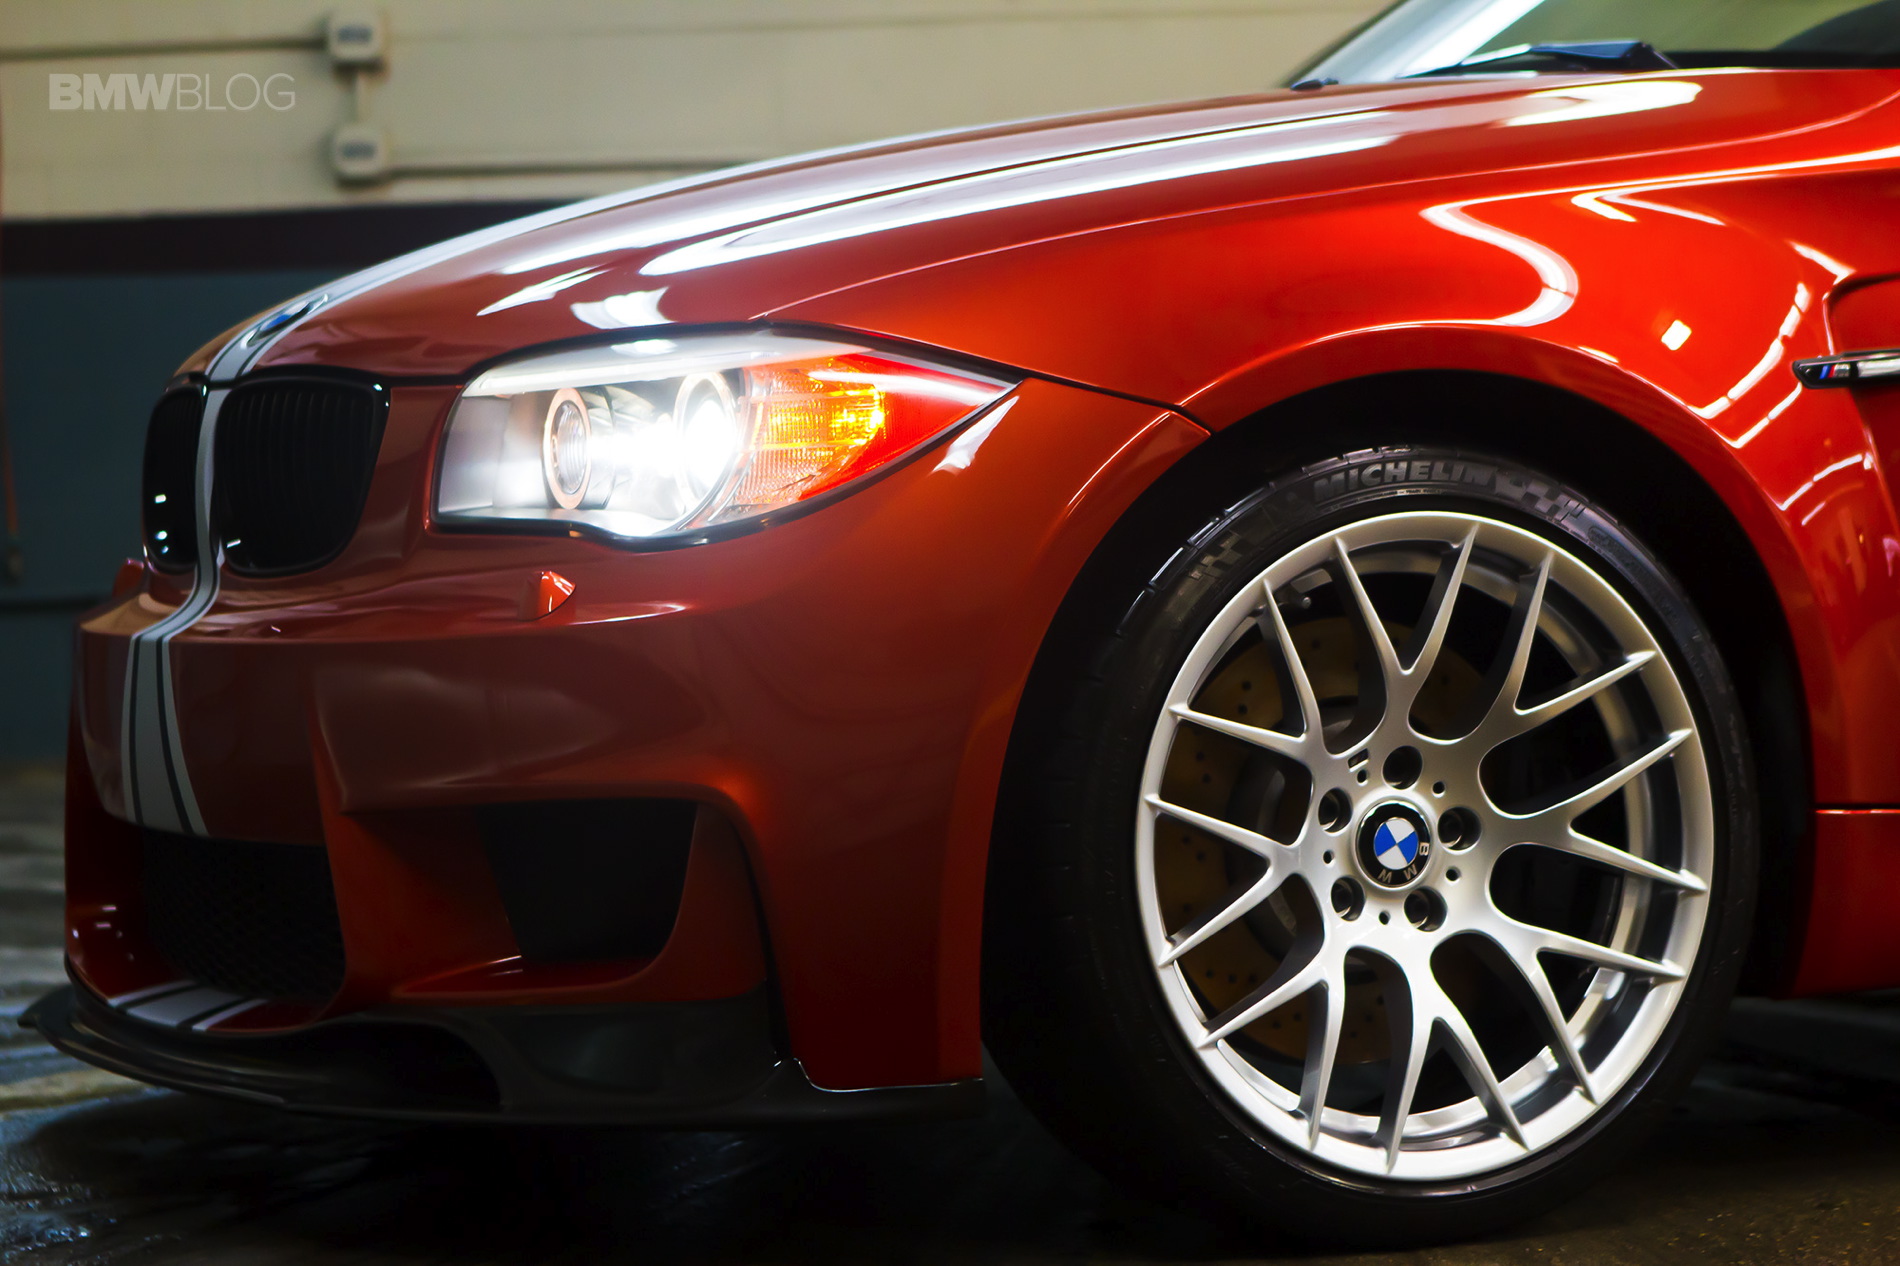
The detail we’re going to outline for you today is the third option, the corrective detail. The detail was done on a 2011 BMW 1M Coupe. Below is an outlined version of everything we did to this car to bring the shine back to the paint, clean the matte vinyl wrap, and protect the entire vehicle from inside out.
Cleaning the Exterior of the Car
What you’ll need:
- Two 5 Gallon Buckets
- Two Grit Guards
- Wash Pads
- pH Balanced Matte Soap
- Wheel Cleanser
- Body, Wheel, Tire Brushes
- Waffle Weave Towels
- Glass Towels
- Wheel Rags


By far the safest way to wash your car is to use the “2 Bucket Wash System”. For this car in particular, because it has a matte vinyl stripe and vinyl roof, it’s safest to use a matte specific car wash soap for the entire car so not to alter the appearance of the vinyl.

When beginning, use the wash pads starting at the top of the car and working down. This will ensure that the dirt from the dirtiest part of the car (the lower third) is not being dragged up the rest of the car. For any kind of dirty wheels, it’ll be helpful to spray the wheels with a wheel cleanser to break down any tough contaminants. For particularly soiled surfaces, the use of brushes can be helpful to lift the contaminants off the surface. Be particular about using dedicated brushes for the body of the car (usually used on the lower third), the wheels, and then the tires.


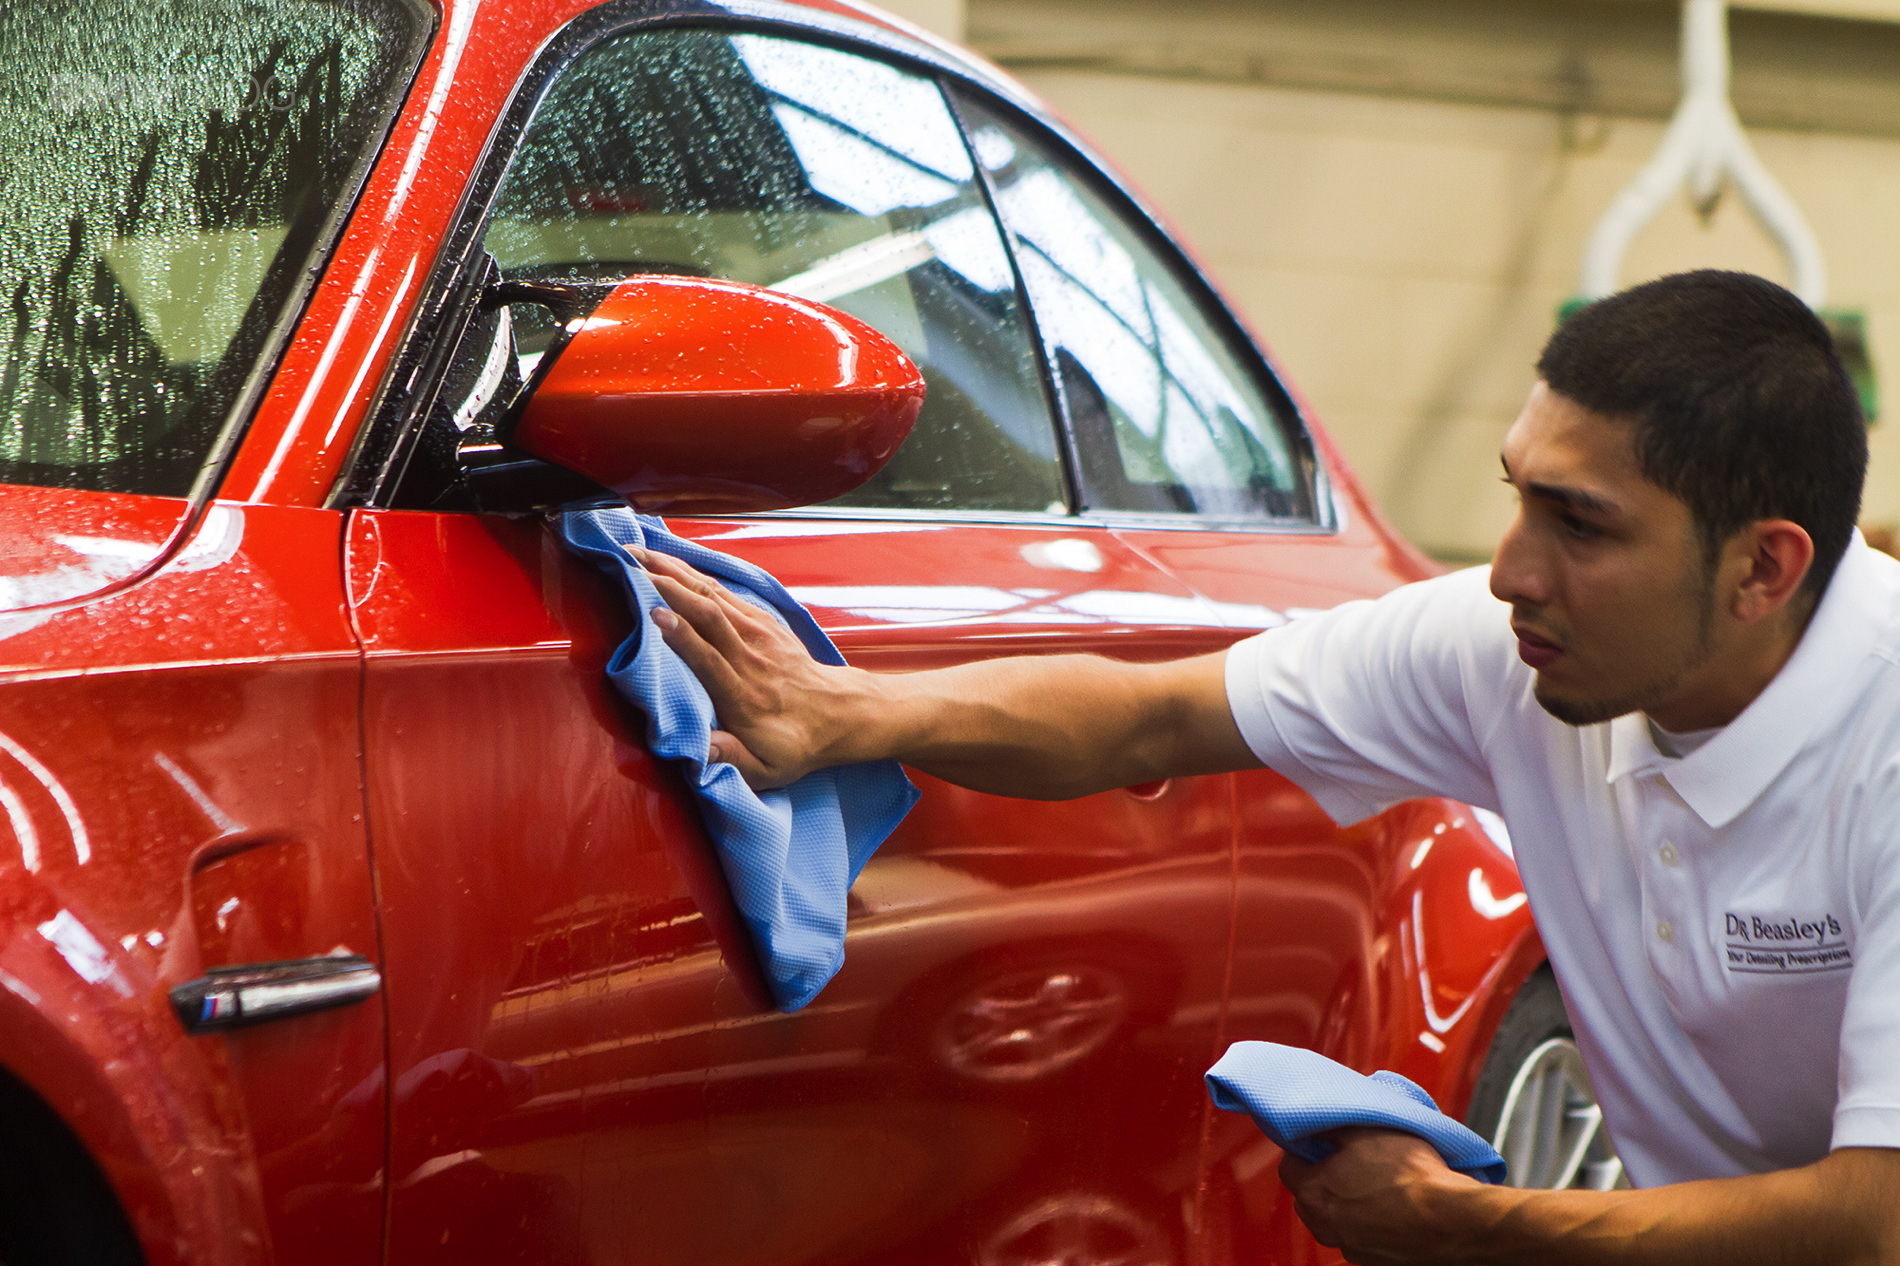
When it comes to drying the car, be mindful of the type of towels you use. The two top causes for light surfaces scratches are caused by improper washing methods and incorrect towels when drying. Microfiber waffle weave towels are best for drying the body of the car (glossy surfaces) while we used a soft terry/pearl microfiber for the matte vinyl. Be mindful to use dedicated towels only for greasy surfaces like the wheels, tires, and door jams.
Inspect the Vehicle
It’s hard to get a good look at the quality of the paint when the car’s dirty. So after washing the exterior it’s important to inspect the paint. This will allow you to determine what kind of detail you need. What we are looking for is the amount and depth of swirls and scratches, stains, and any other imperfections. At the same time we also look at the vinyl to look for chips and stains.
You could also perform a plastic bag test. This is going to test to see if there are contaminants embedded in the paint. Take a thin plastic bag, like a grocery bag, and stick your hand in it. Then run your hand over different panels of the car. A positive plastic bag test feels bumpy and textured, you’re feeling the contaminants that have embedded themselves in the paint. A negative test feels perfectly smooth.
The BMW 1M happened to have very small shallow swirls in the paint, a few spots in the vinyl, and a positive plastic bag test. What this tells us is that the car needs to be polished in order to perfect the paint and prep it for a coating and wax.
Polishing the Paint
- Polishing Machine
- Polishing Chemical
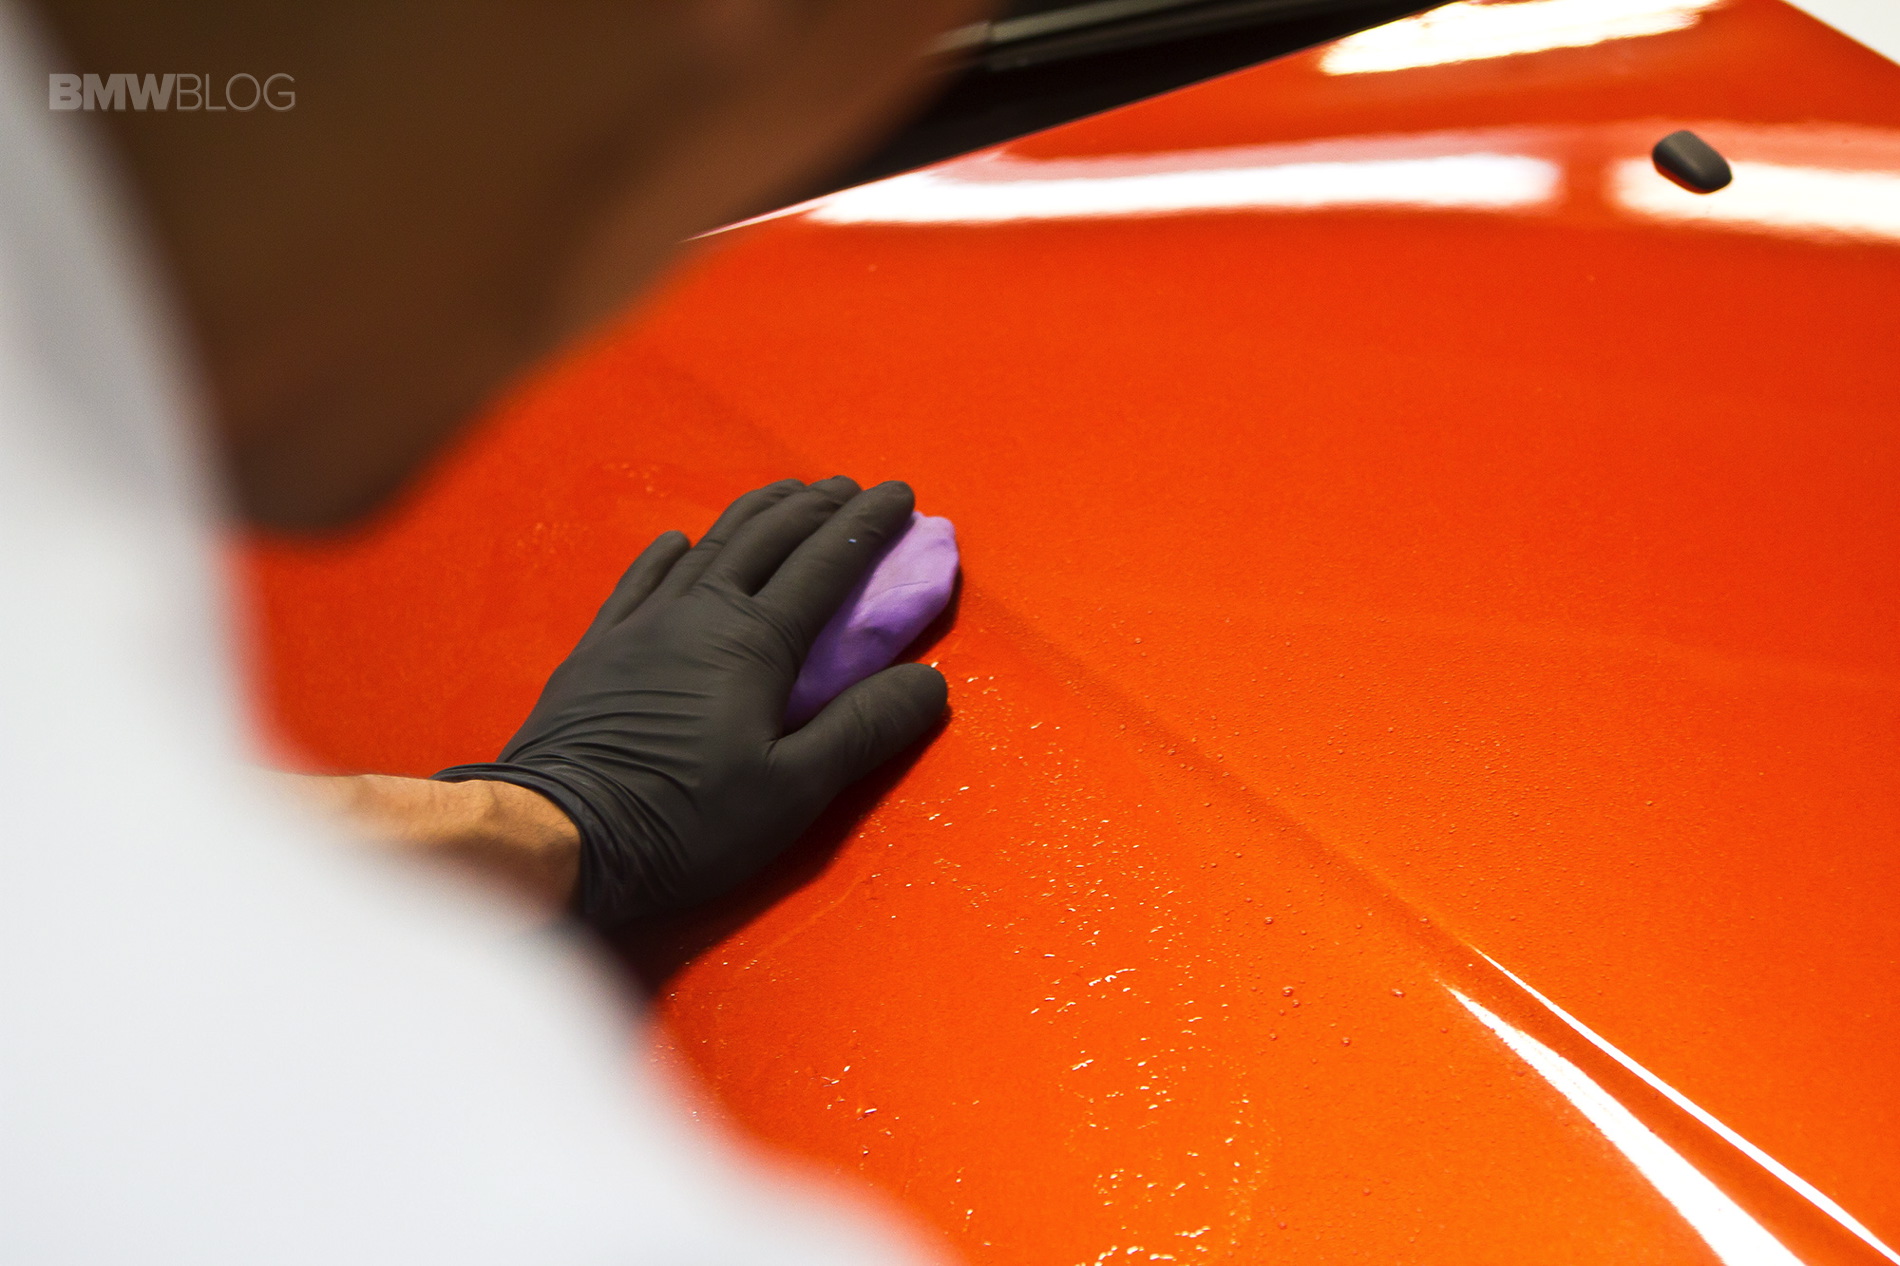
- Clay Bar
- Clay Lubricant
Now that we’ve decided that we need to lightly buff the paint, we have to prep the surface to be polished.


Because we had a positive plastic bag test, we need to remove those contaminants from the paint. Otherwise, the buffing machine on the paint is going to pick up those contaminants and grind them into the paint making scratches called “swirls”.
You can remove these contaminants by claying the car. There are different grades of clay. Higher grades are for more contaminated surfaces. Use a clay bar and a lubricant and go once over the car. Dry the car with a microfiber towel and move on.
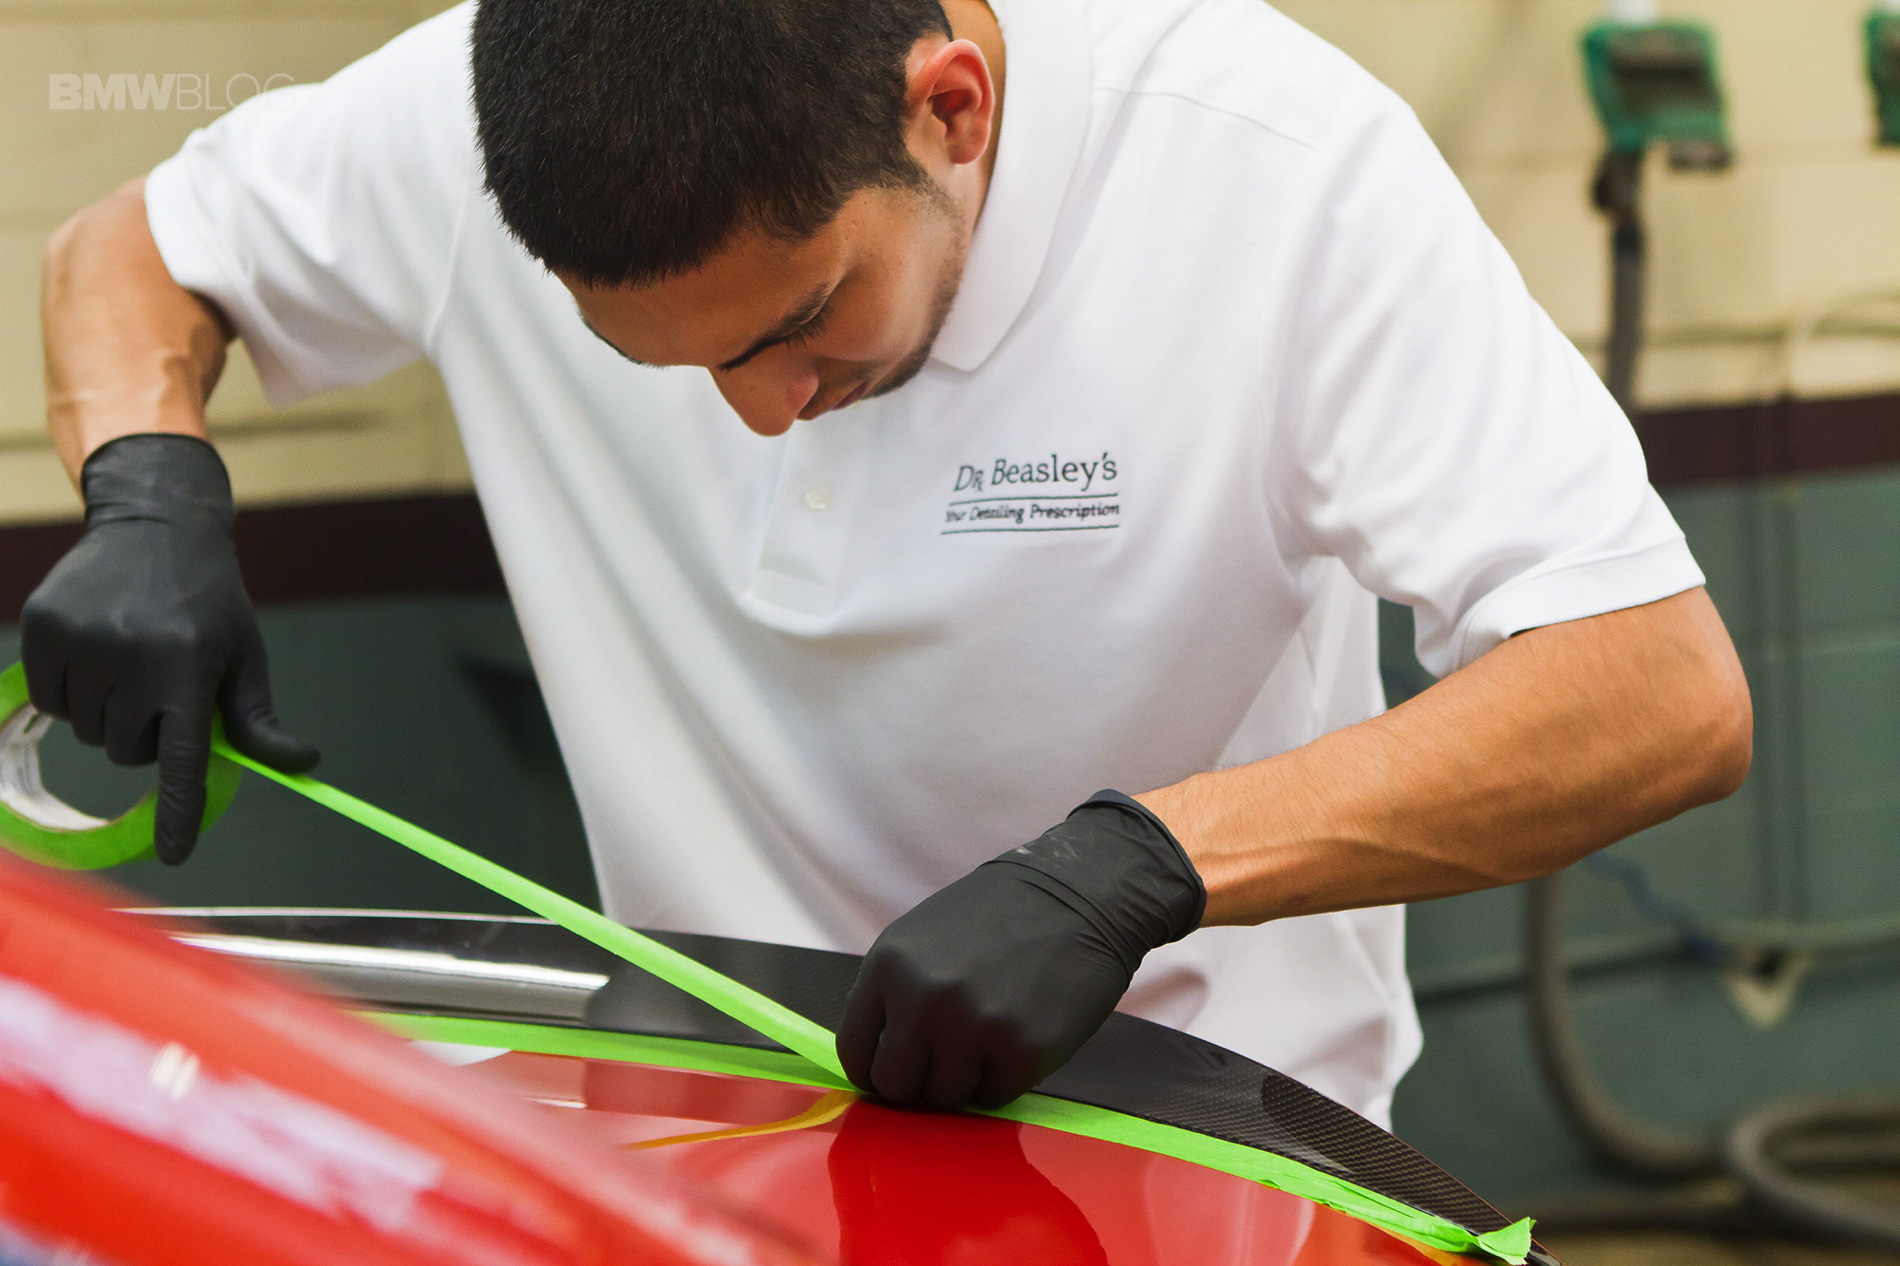
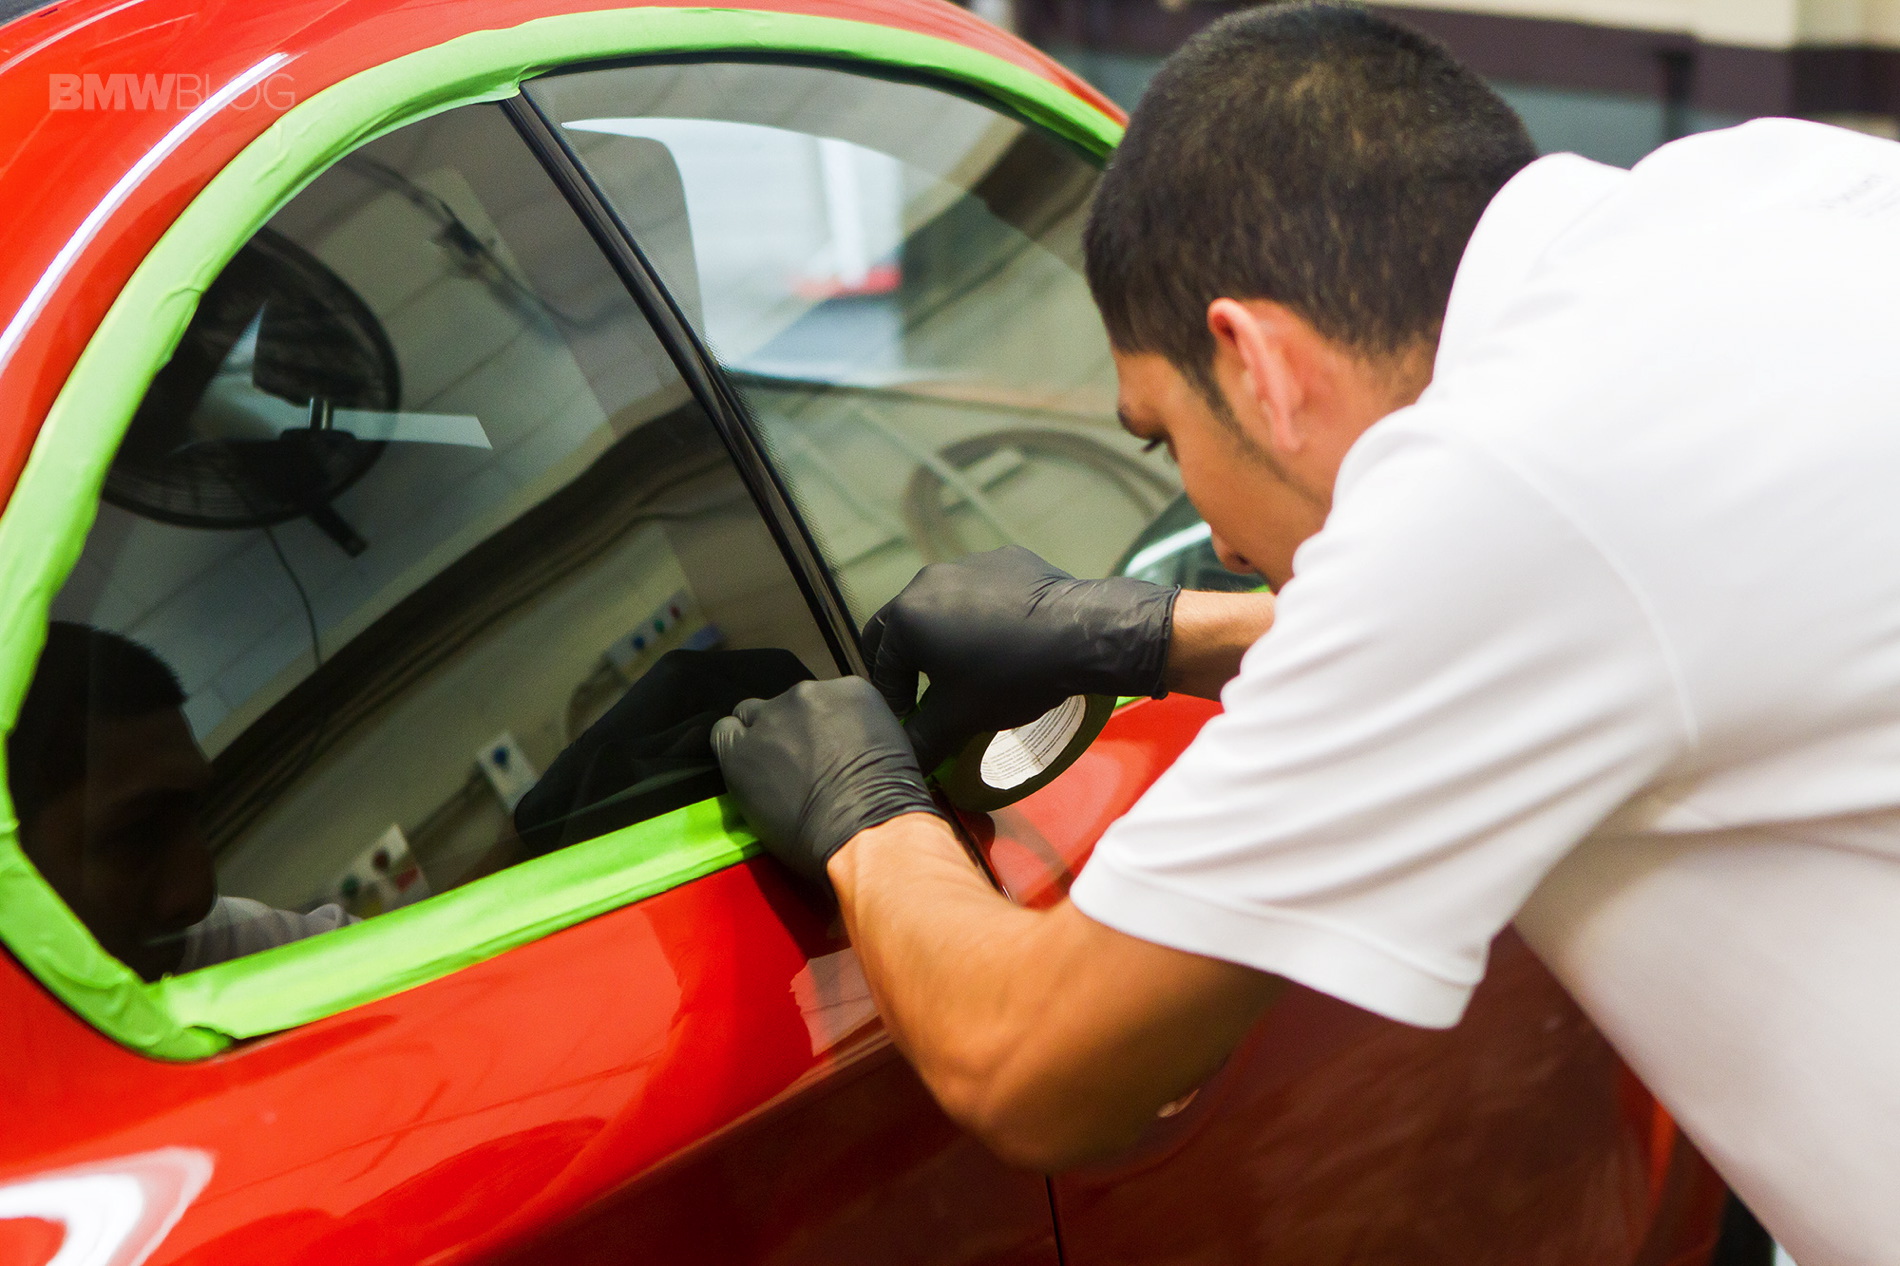
The next step is to tape (painter’s tape) off all the areas that you don’t want to polish. So you tape off bading, emblems, rubber/plastic trim, glass, and everything else that isn’t a glossy painted surface.
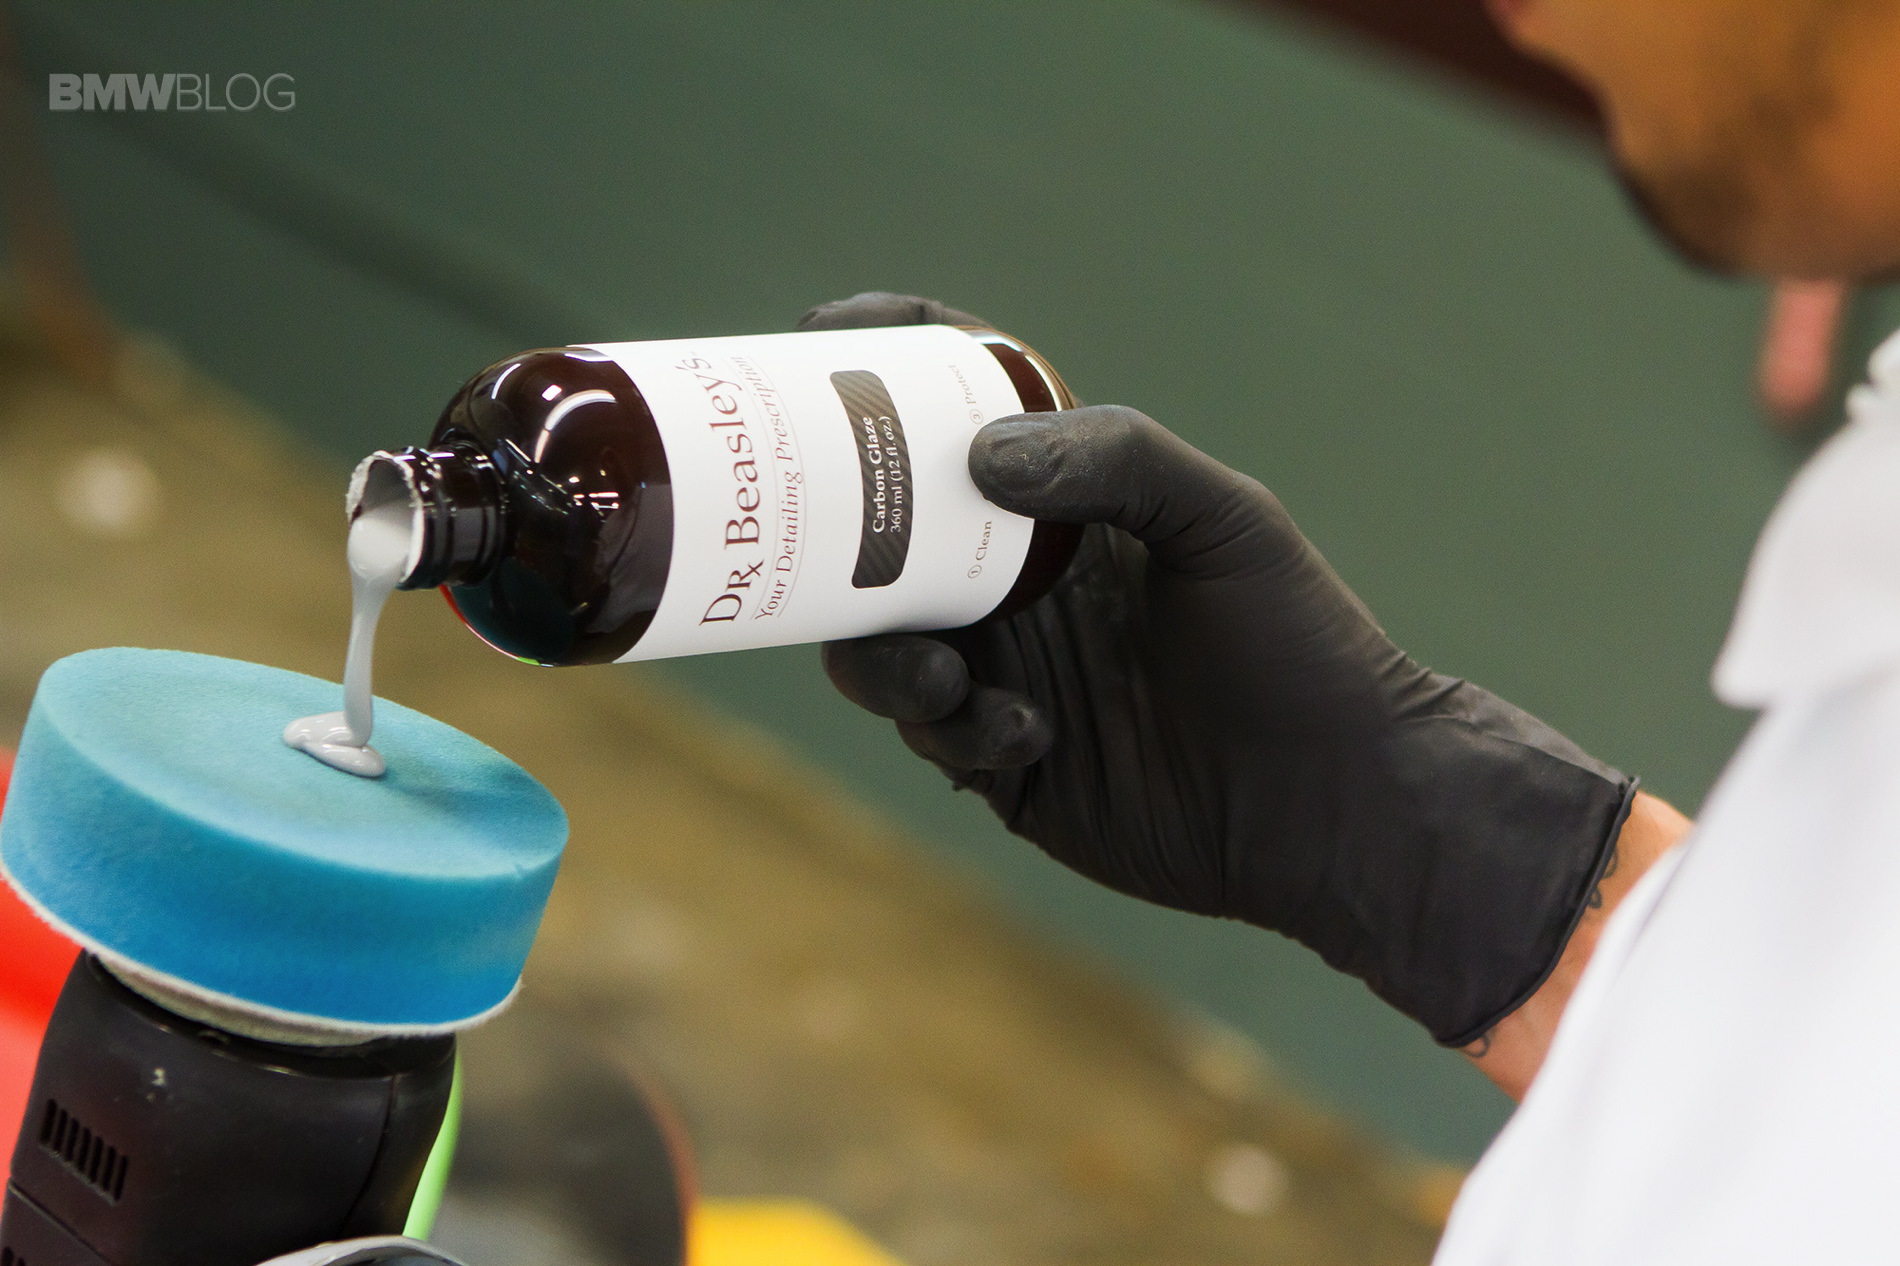
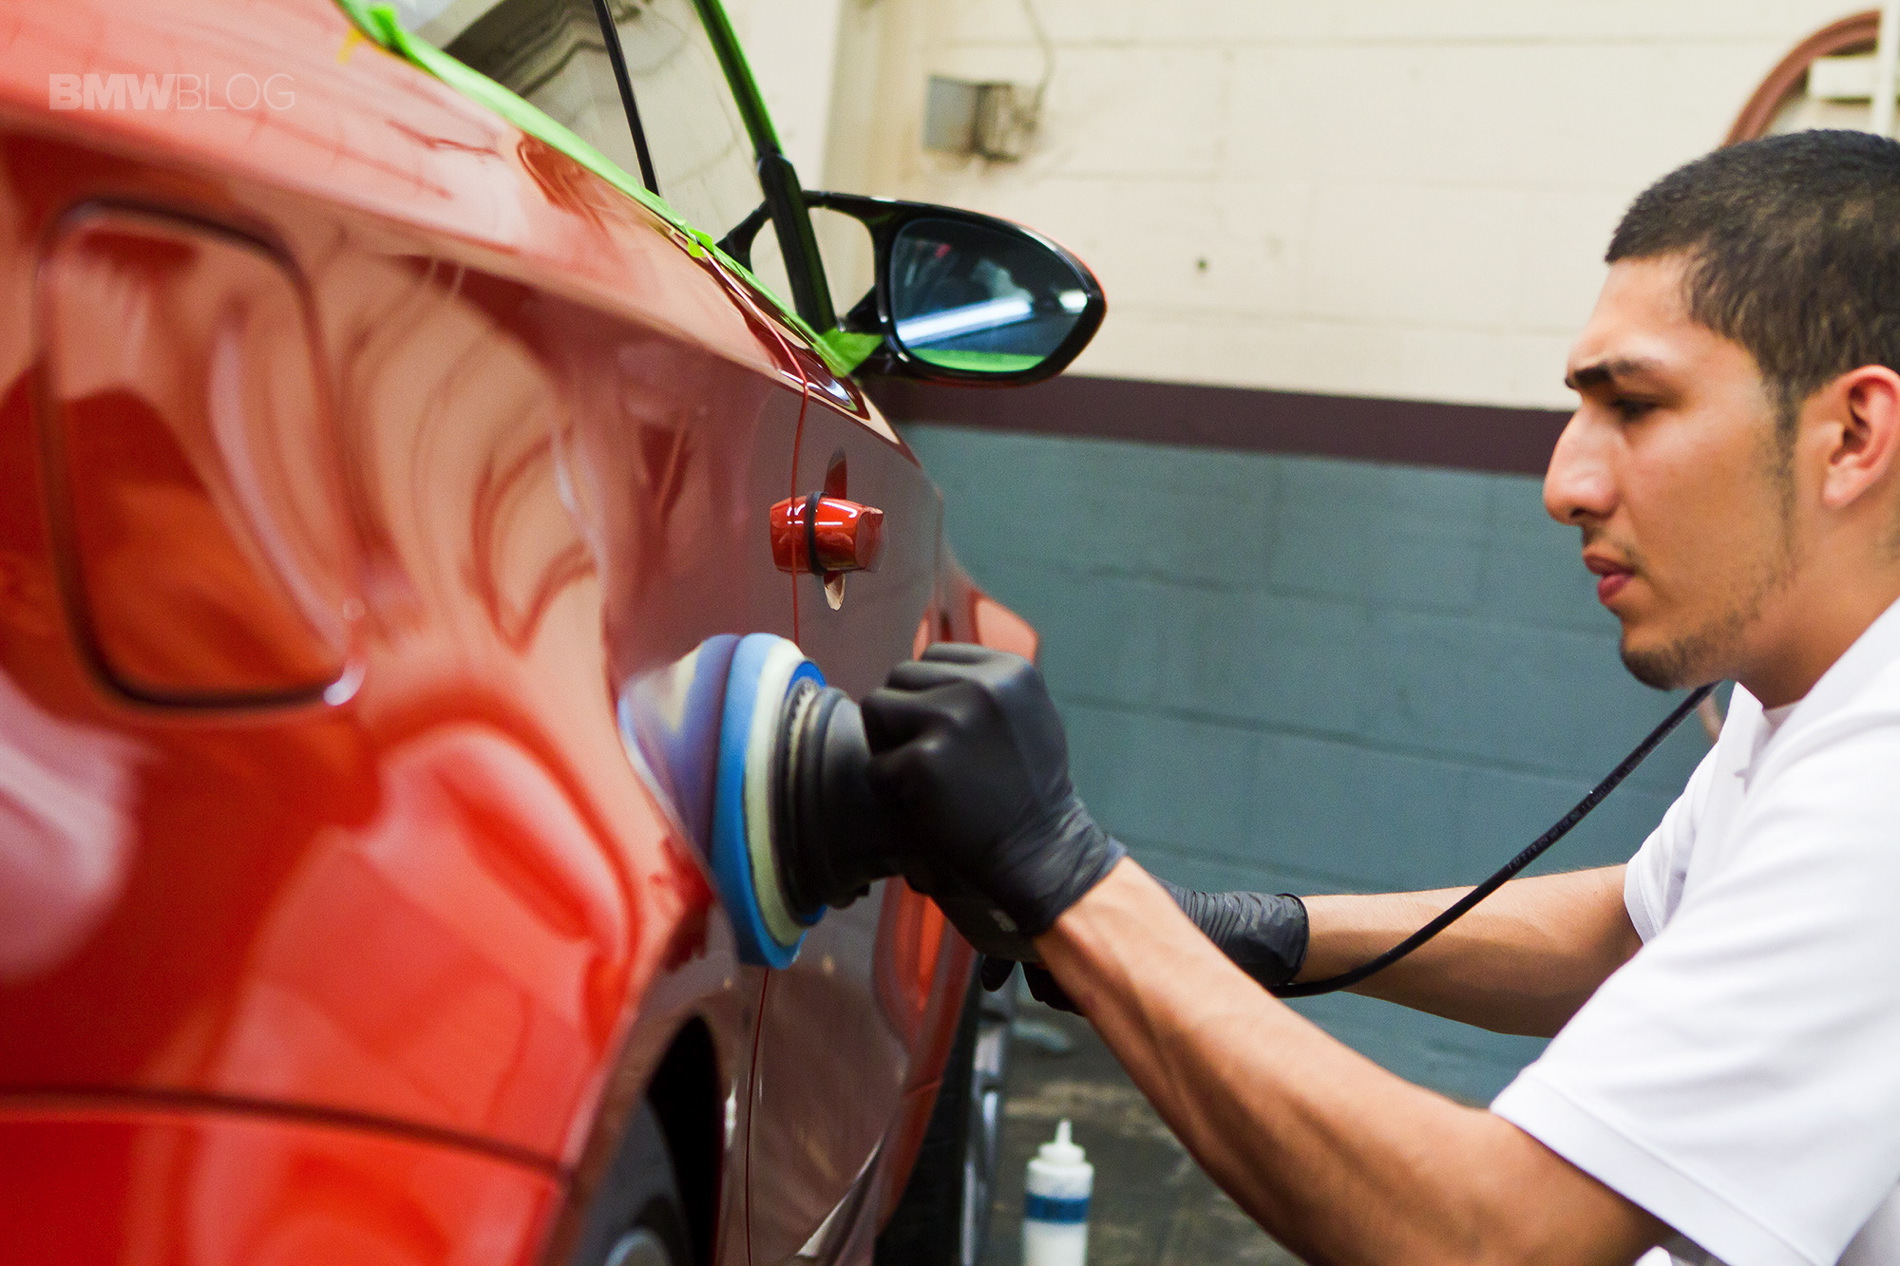

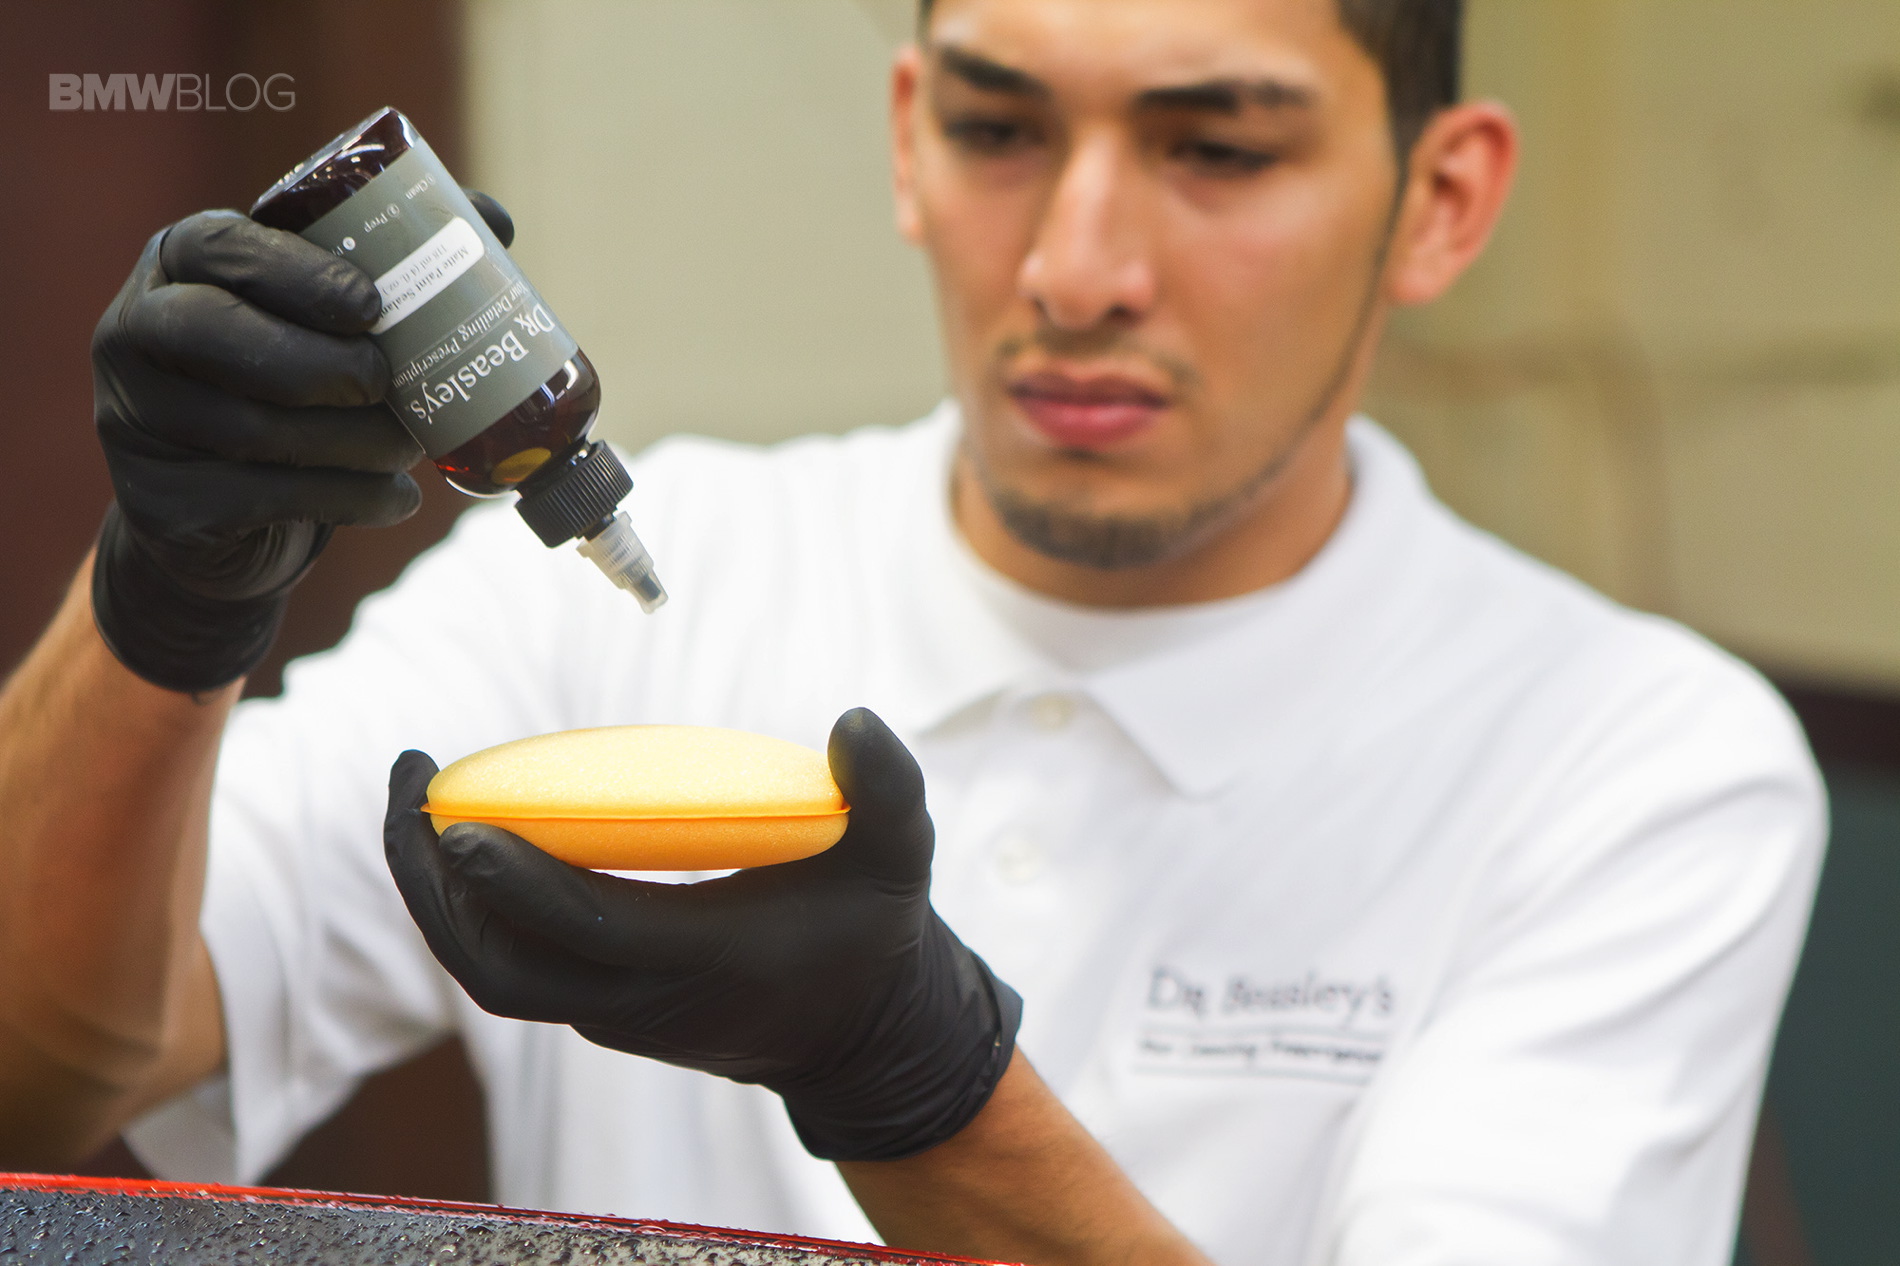
The amount of correction needed is going to determine many things: the polish chemicals, the pad, the speed and the pressure applied to the buffer. We used a Rupes Big Foot and blue foam cutting pad for this job. Then we used Dr. Beasley’s Heritage Series Polishes for the painted surfaces and Carbon Glaze for the carbon fiber panels.
Heritage Series Medium is a correcting polish for cutting into the clear coat and removing slight scratches and swirls. After going over the entire car with this product, we then came back with Heritage Series Fine to smooth out the paint and bring that ‘pop’ back to the finish.
Carbon Glaze is used as a very light polish for the carbon fiber resin to remove slight scratches and hazing and bring to bring back that deep black color to the surface.
Whenever it comes to polishing, it’s always important to inspect your work as you go. Using an LED light to look into the paint is effective in ensuring that you’re removing the swirls as you go. Polishing is abrasive and can potentially damage your paint if you’re not doing it correctly. Be sure to study best practices in polishing before you start.
Cleaning Spots from the Vinyl
Cleaning the vinyl is as simple as using a matte specific surface cleanser. By allowing the cleanser to sit on the vinyl, it will break down contaminants like sap, overspray, and water spots. It’s important to break down contaminants chemically so you don’t have to rub the vinyl too hard. Excessive friction can damage a matte surface.
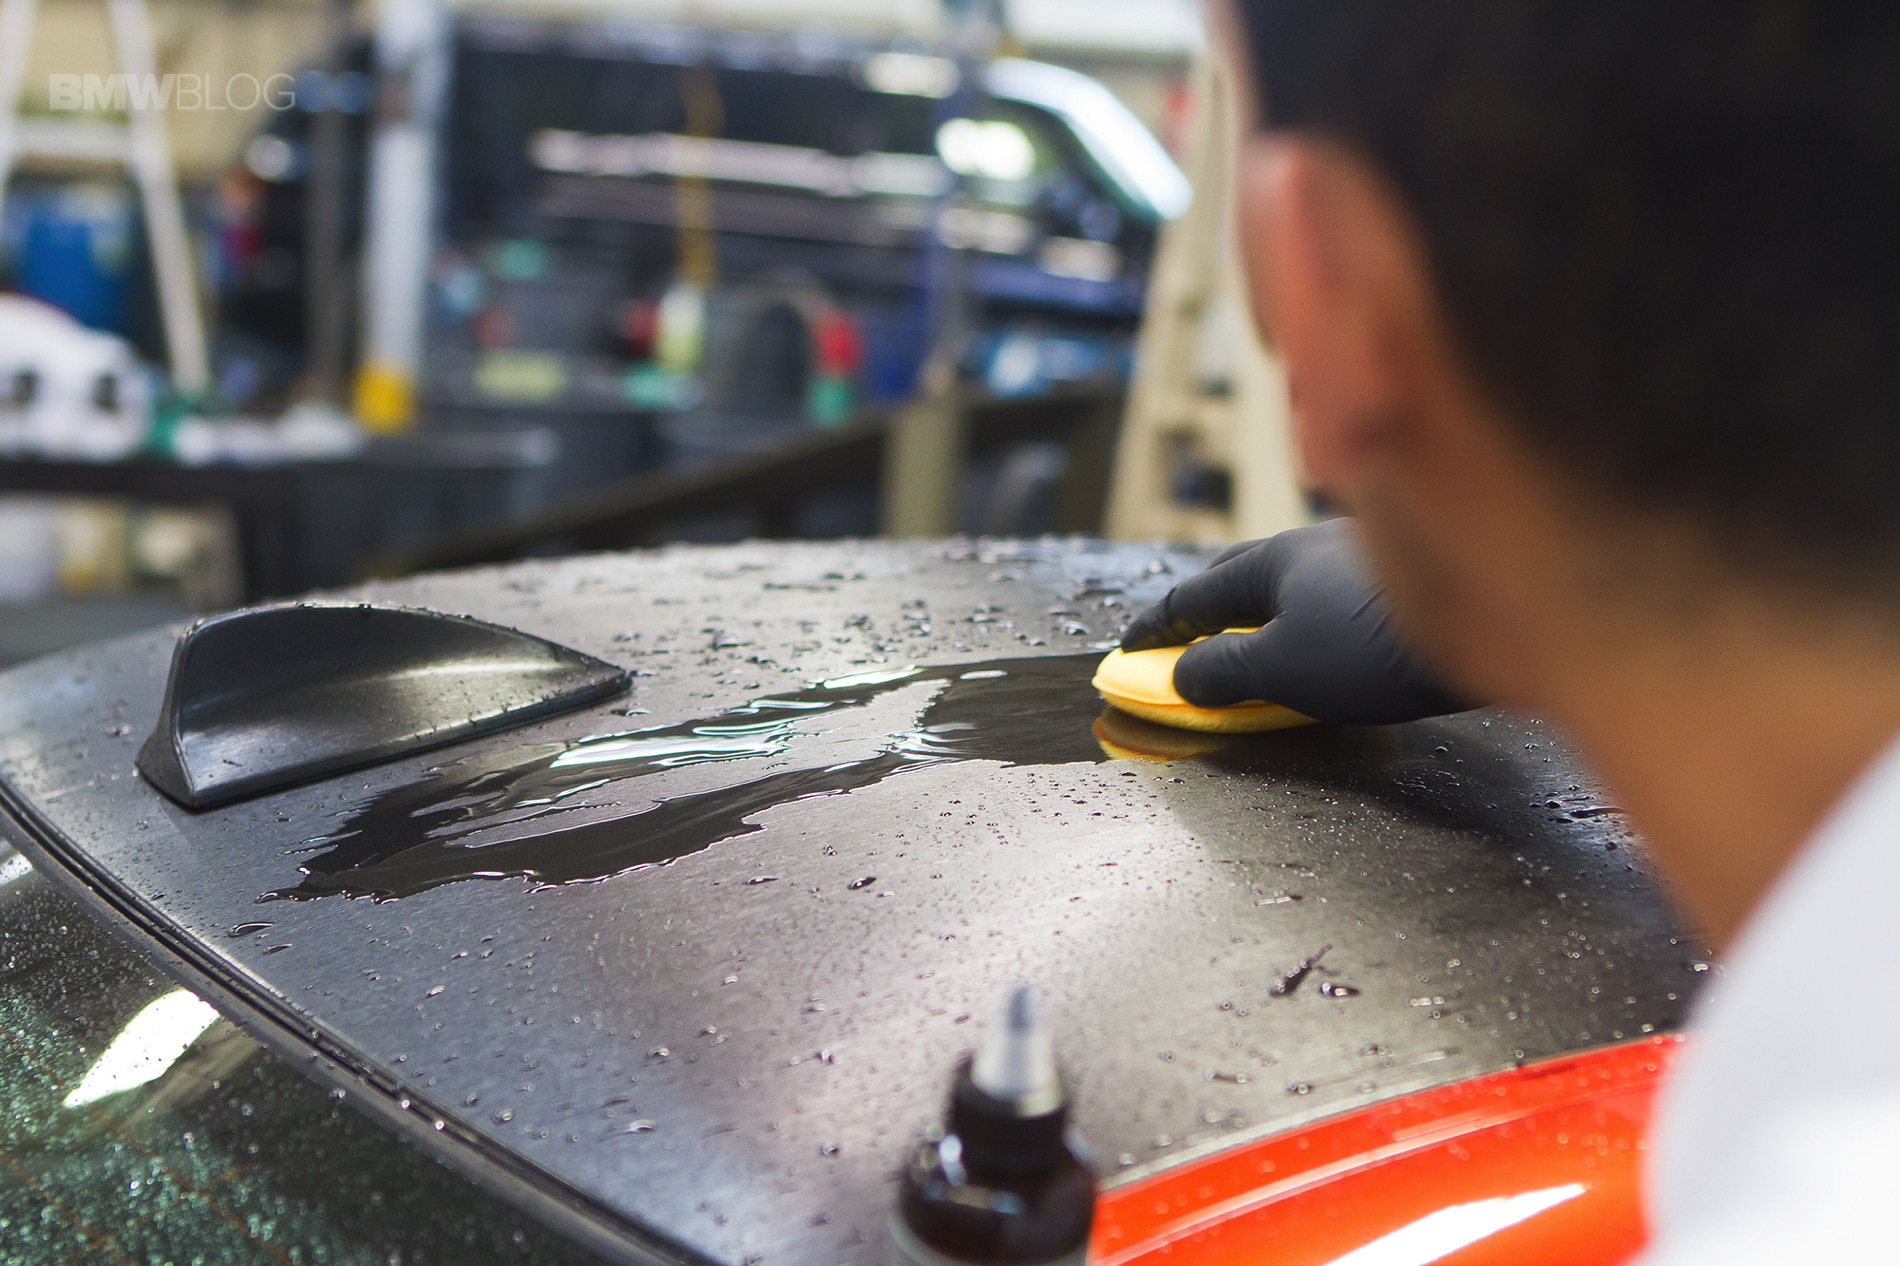
Coating the Paint
A coating bonds to the paint best when the surface is properly prepped. By removing swirls and a the smallest layer of clear coat from the paint, you’re creating a fresh and clean surface to allow the coating to bond.
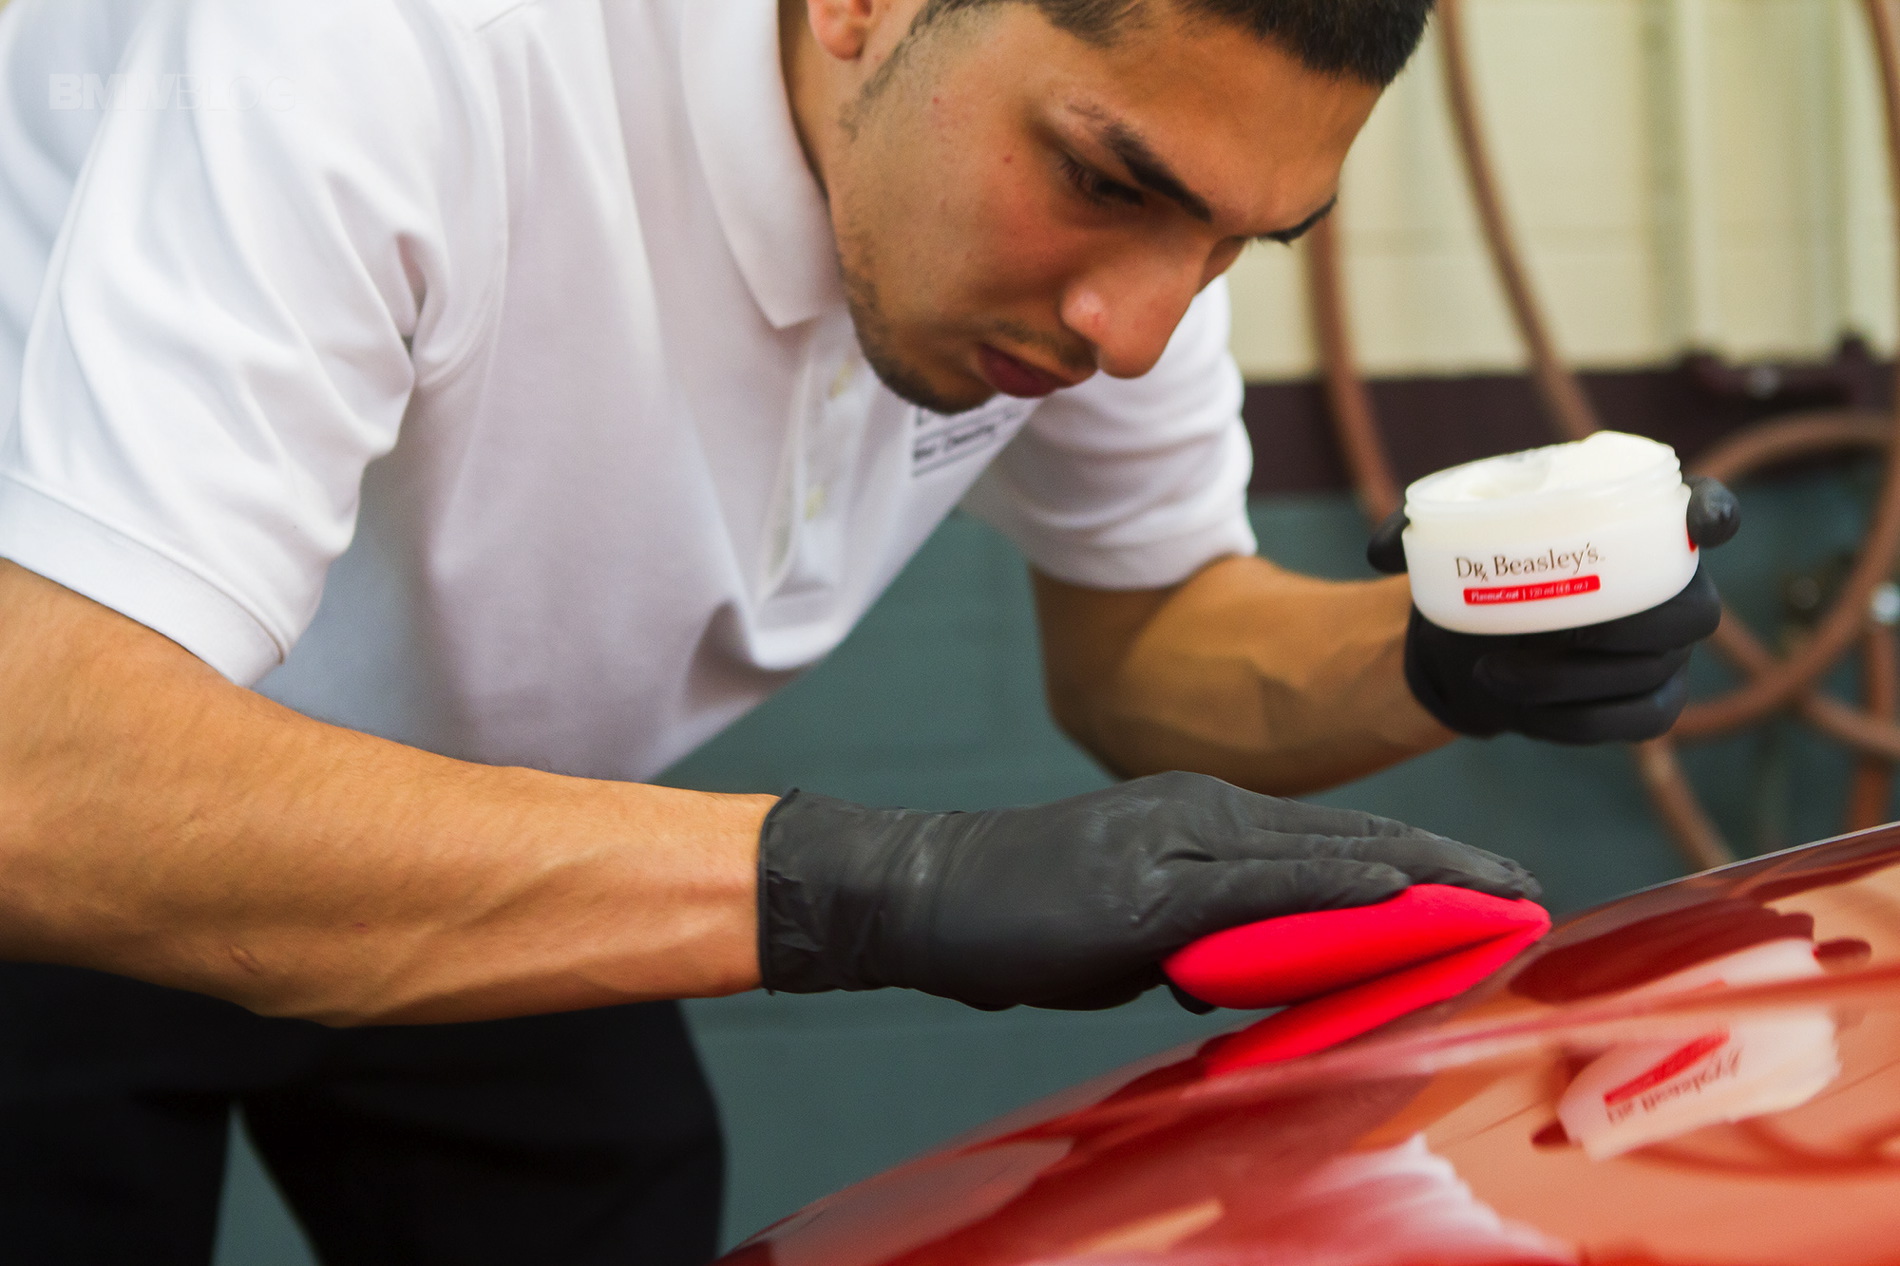
To prepare this 1M for winter, we layered Dr. Beasley’s PlasmaCoat and Ivory Carnauba Wax on top of each other. PlasmaCoat creates a durable bond to the paint that will last up to a year. It protects the surface from staining, etching, and UV damage like fading. PlasmaCoat is the designated base layer so that it can bond directly to the paint and carbon fiber to protect them. Ivory Carnuaba Wax can then be layered on top to provide a deep and rich glow to the paint. Ivory will only last a couple of months, but it provides the shine that we wanted to achieve for the 1M owner.
As you might be able to tell, the name of the game is protection. That includes protecting the matte vinyl wrap with Matte Paint Sealant. By taking a water spray bottle, wet the vinyl and then apply the sealant. This reaction between the water and the sealant will create an instant bond that is protective yet invisible. It will protect from staining and fading but it won’t alter the look of the surface at all.
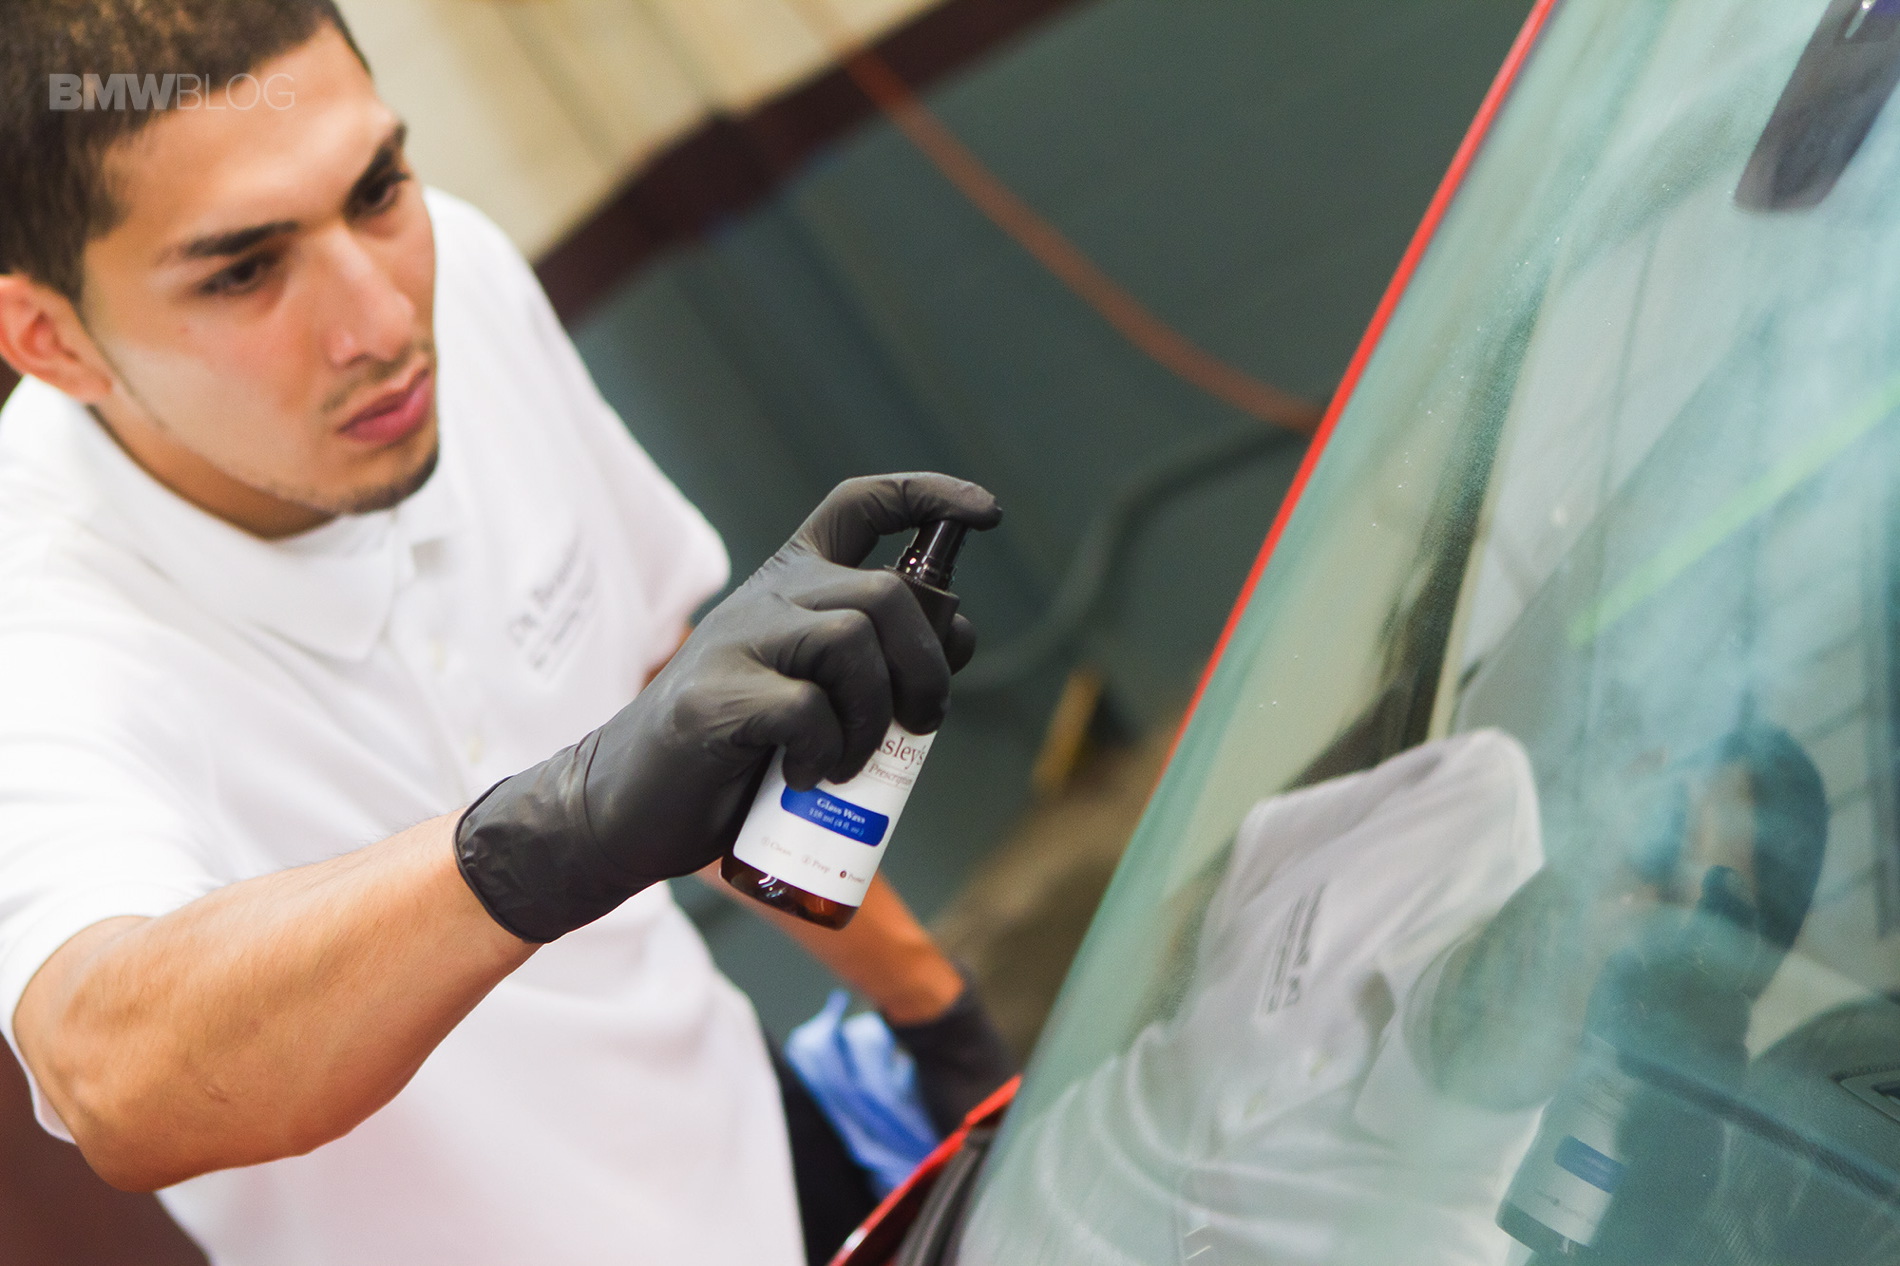
Window Treatment
Cleaning the glass is one thing, but treating the glass with a hydrophobic coating will increase visibility while driving in rain, snow, and sleet. The coating will bead water off the vehicle while driving to assist the wiper blades in removing the water to improve the driver’s vision.
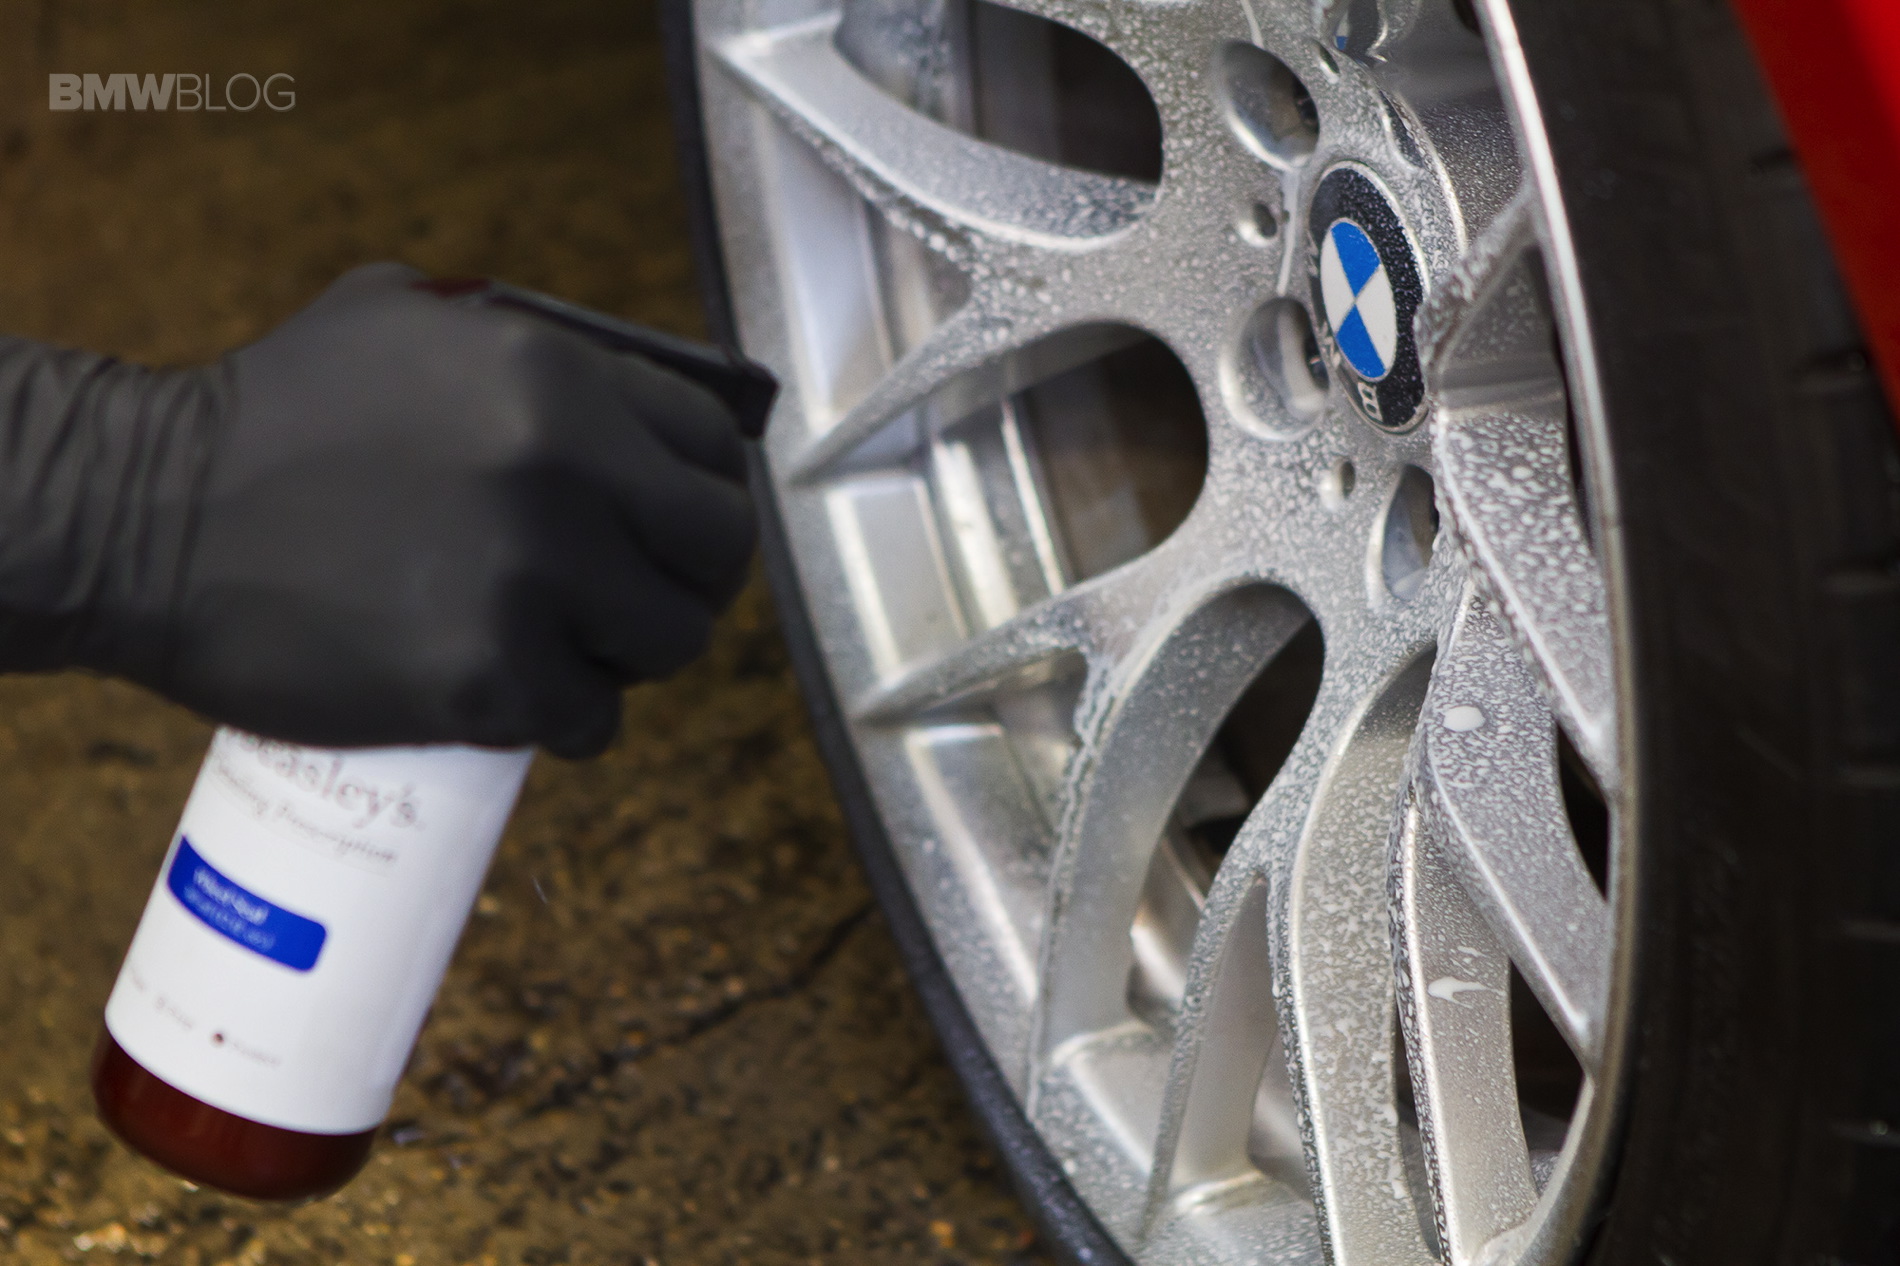
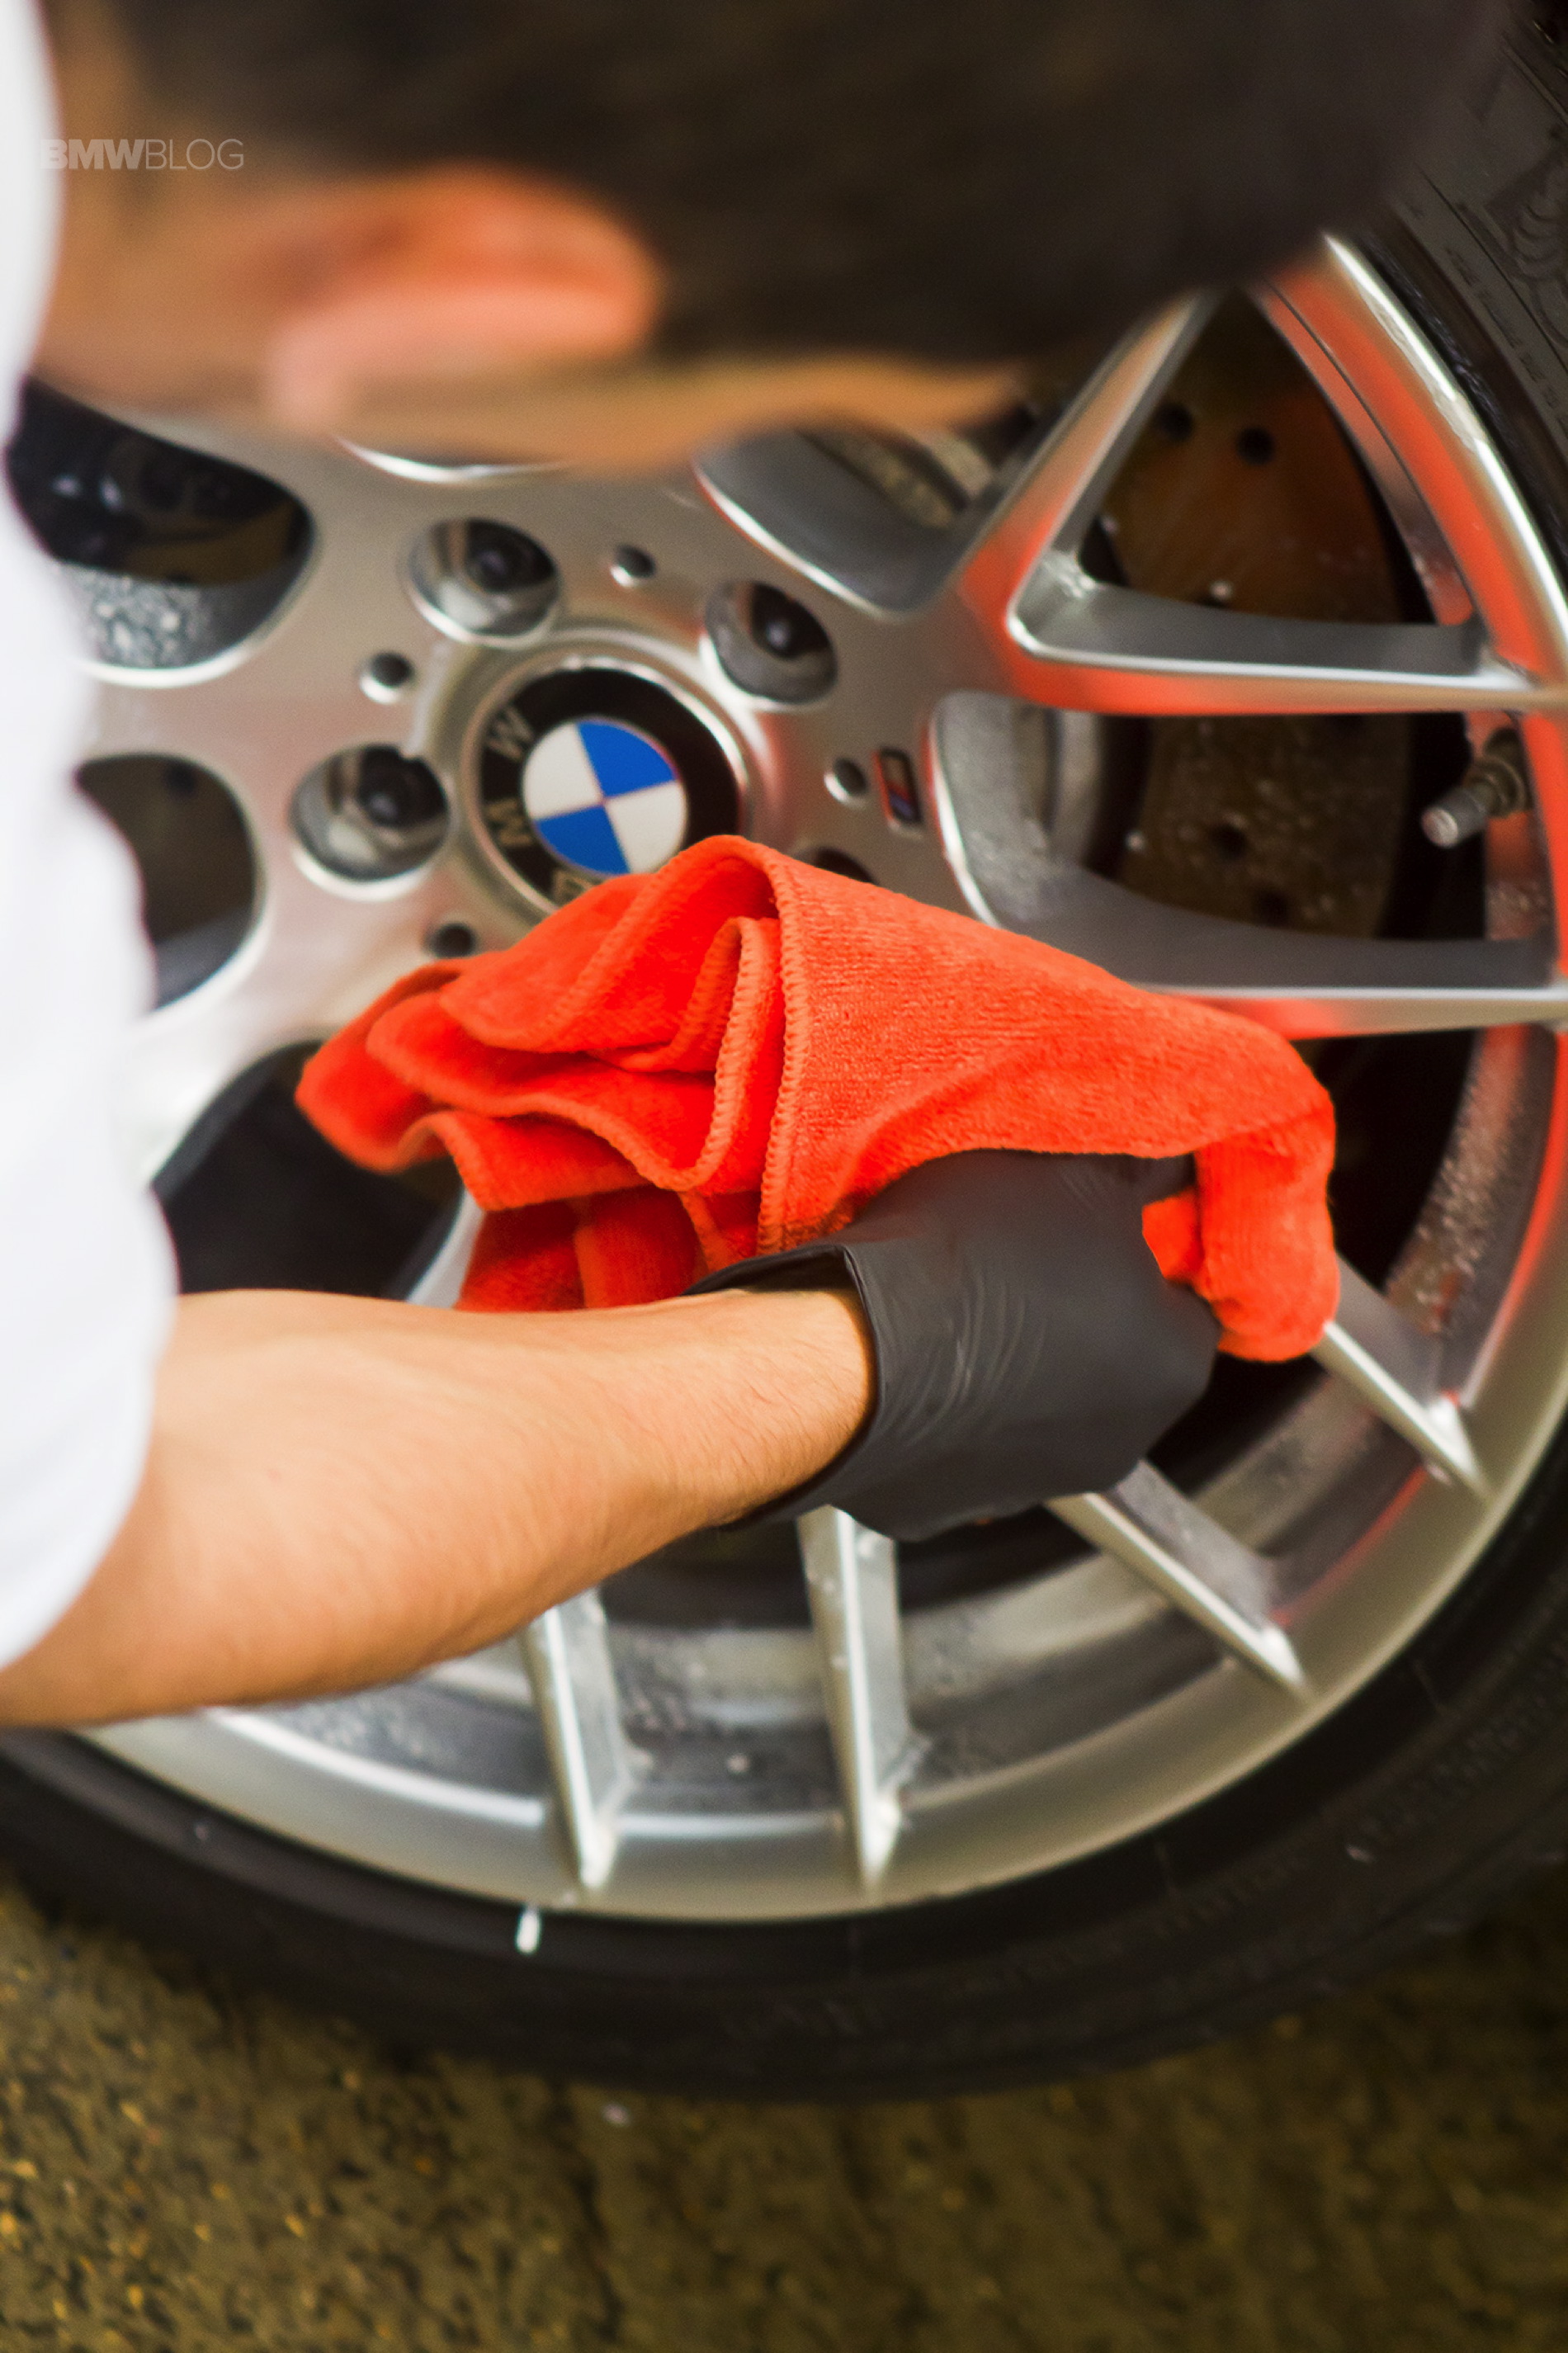
Wheels and Tires
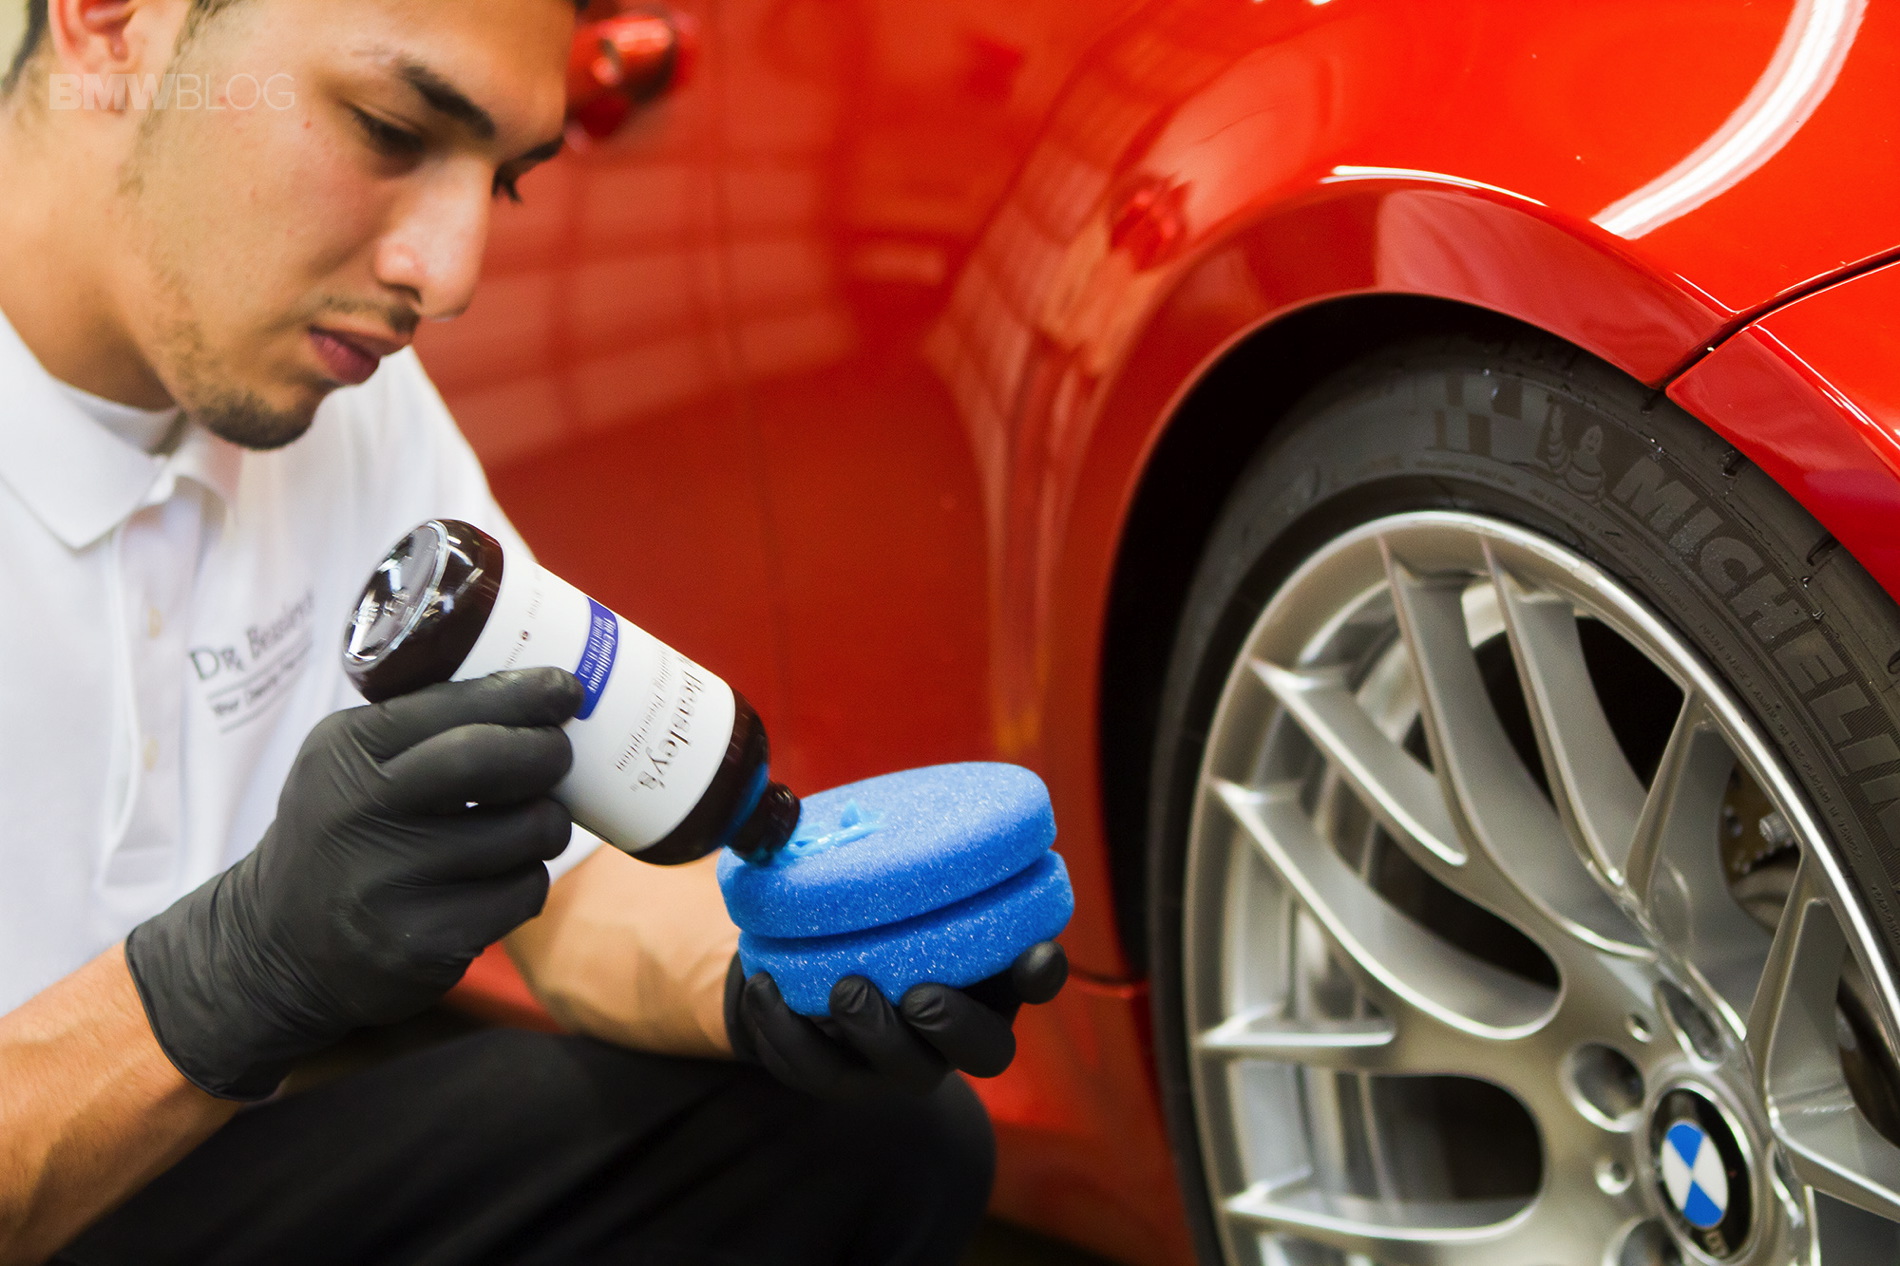
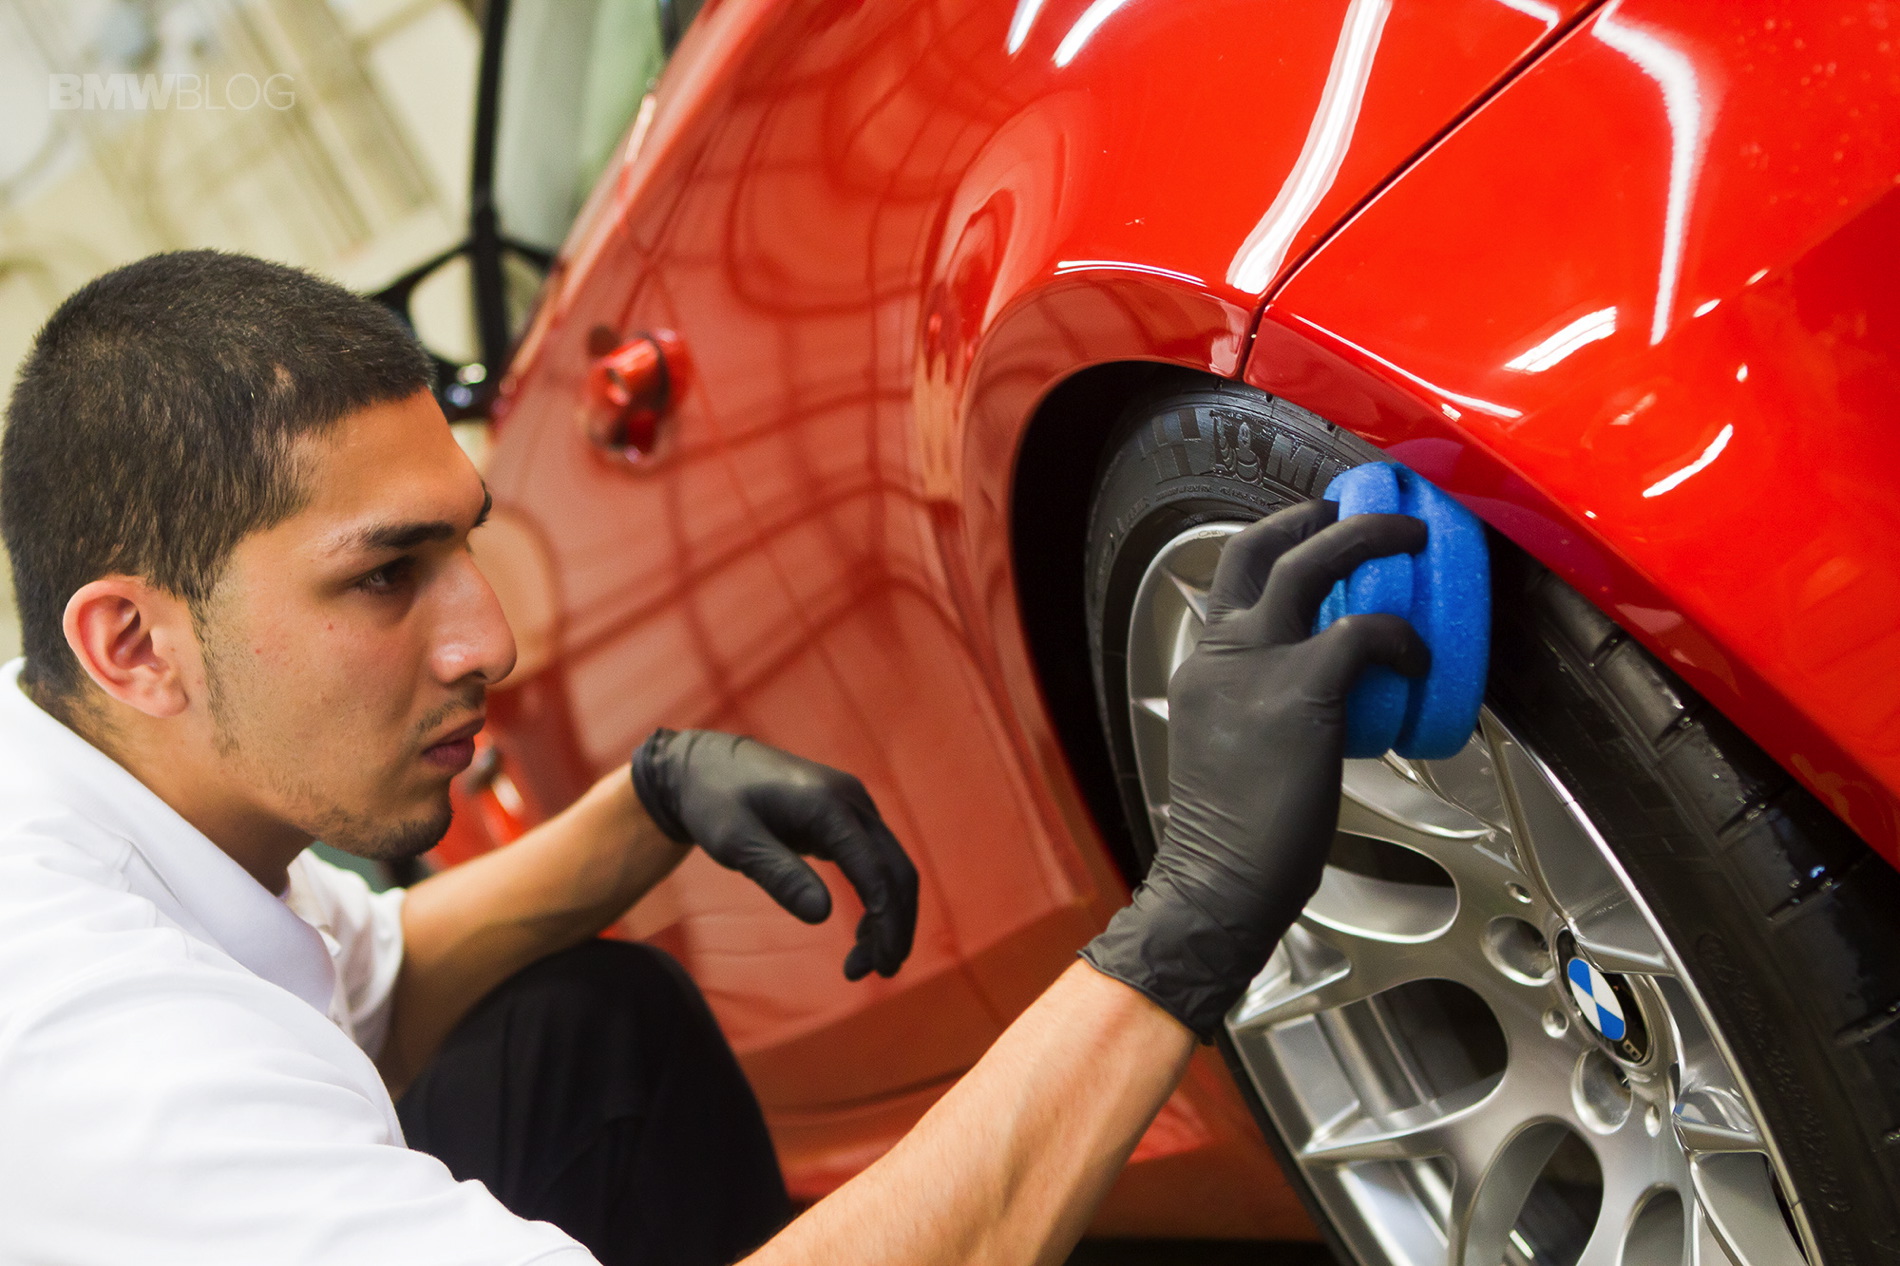
Now that the wheels been cleaned, we coated the wheels with a sealant. A wheel sealant with no flash point will protect the wheels from brake dust, road grime, and salt. The lack of a flash point means that however hot the wheels get, the sealant won’t come off.
The tires require a tire conditioner that properly moisturizes the the rubber. By actually penetrating the rubber, the tire will remain healthy by being moisturized from the inside out to protect from fading, drying, cracking, and browning.
Cleaning the Interior

When we get to the interior, there’s a common misconception that all you need to do is vacuum, dust, and at most grab some all-purpose cleaner for spot cleaning. This could possibly get your car looking clean, but a detail goes way more in depth into the cleaning and protecting process.
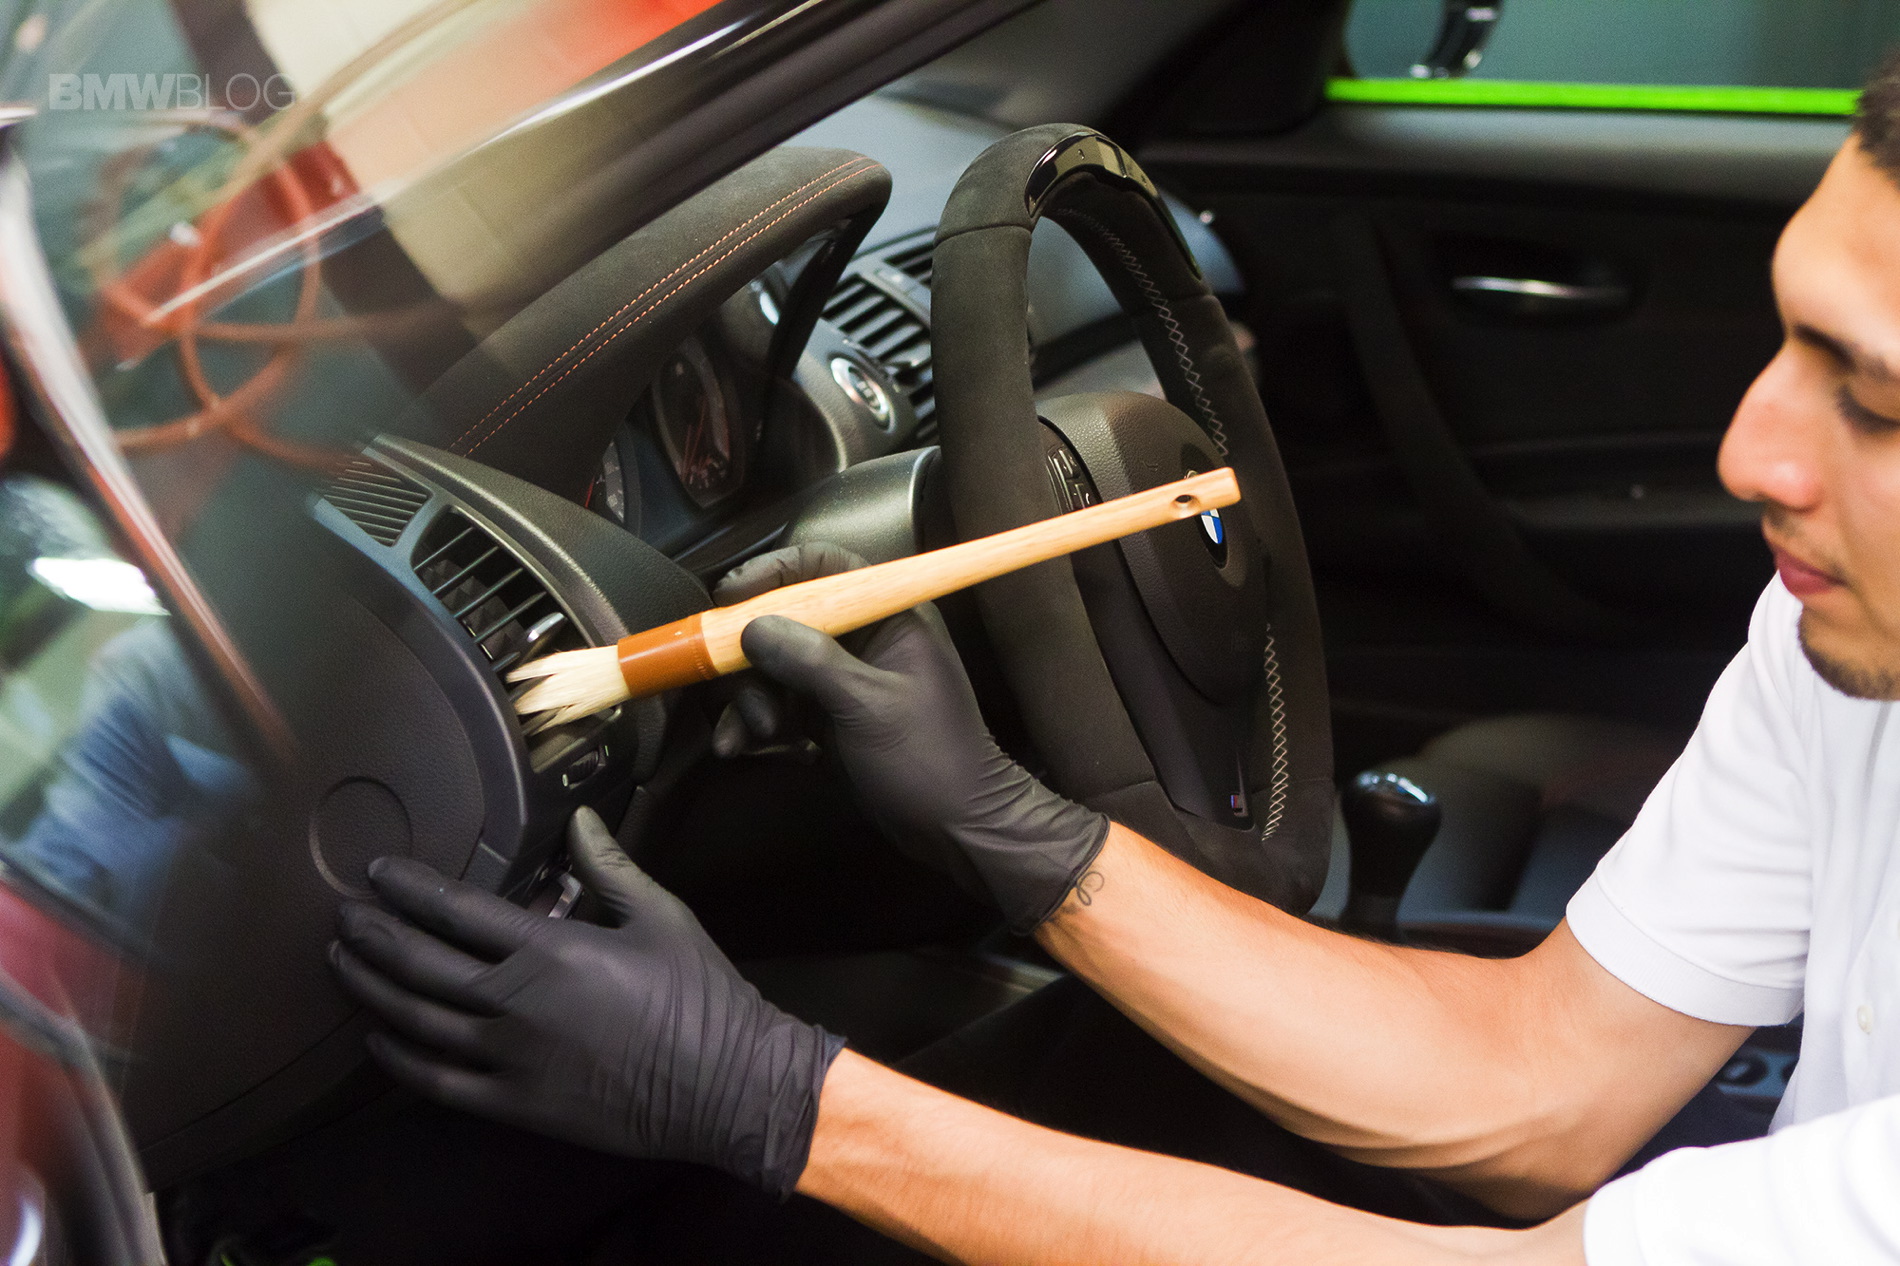
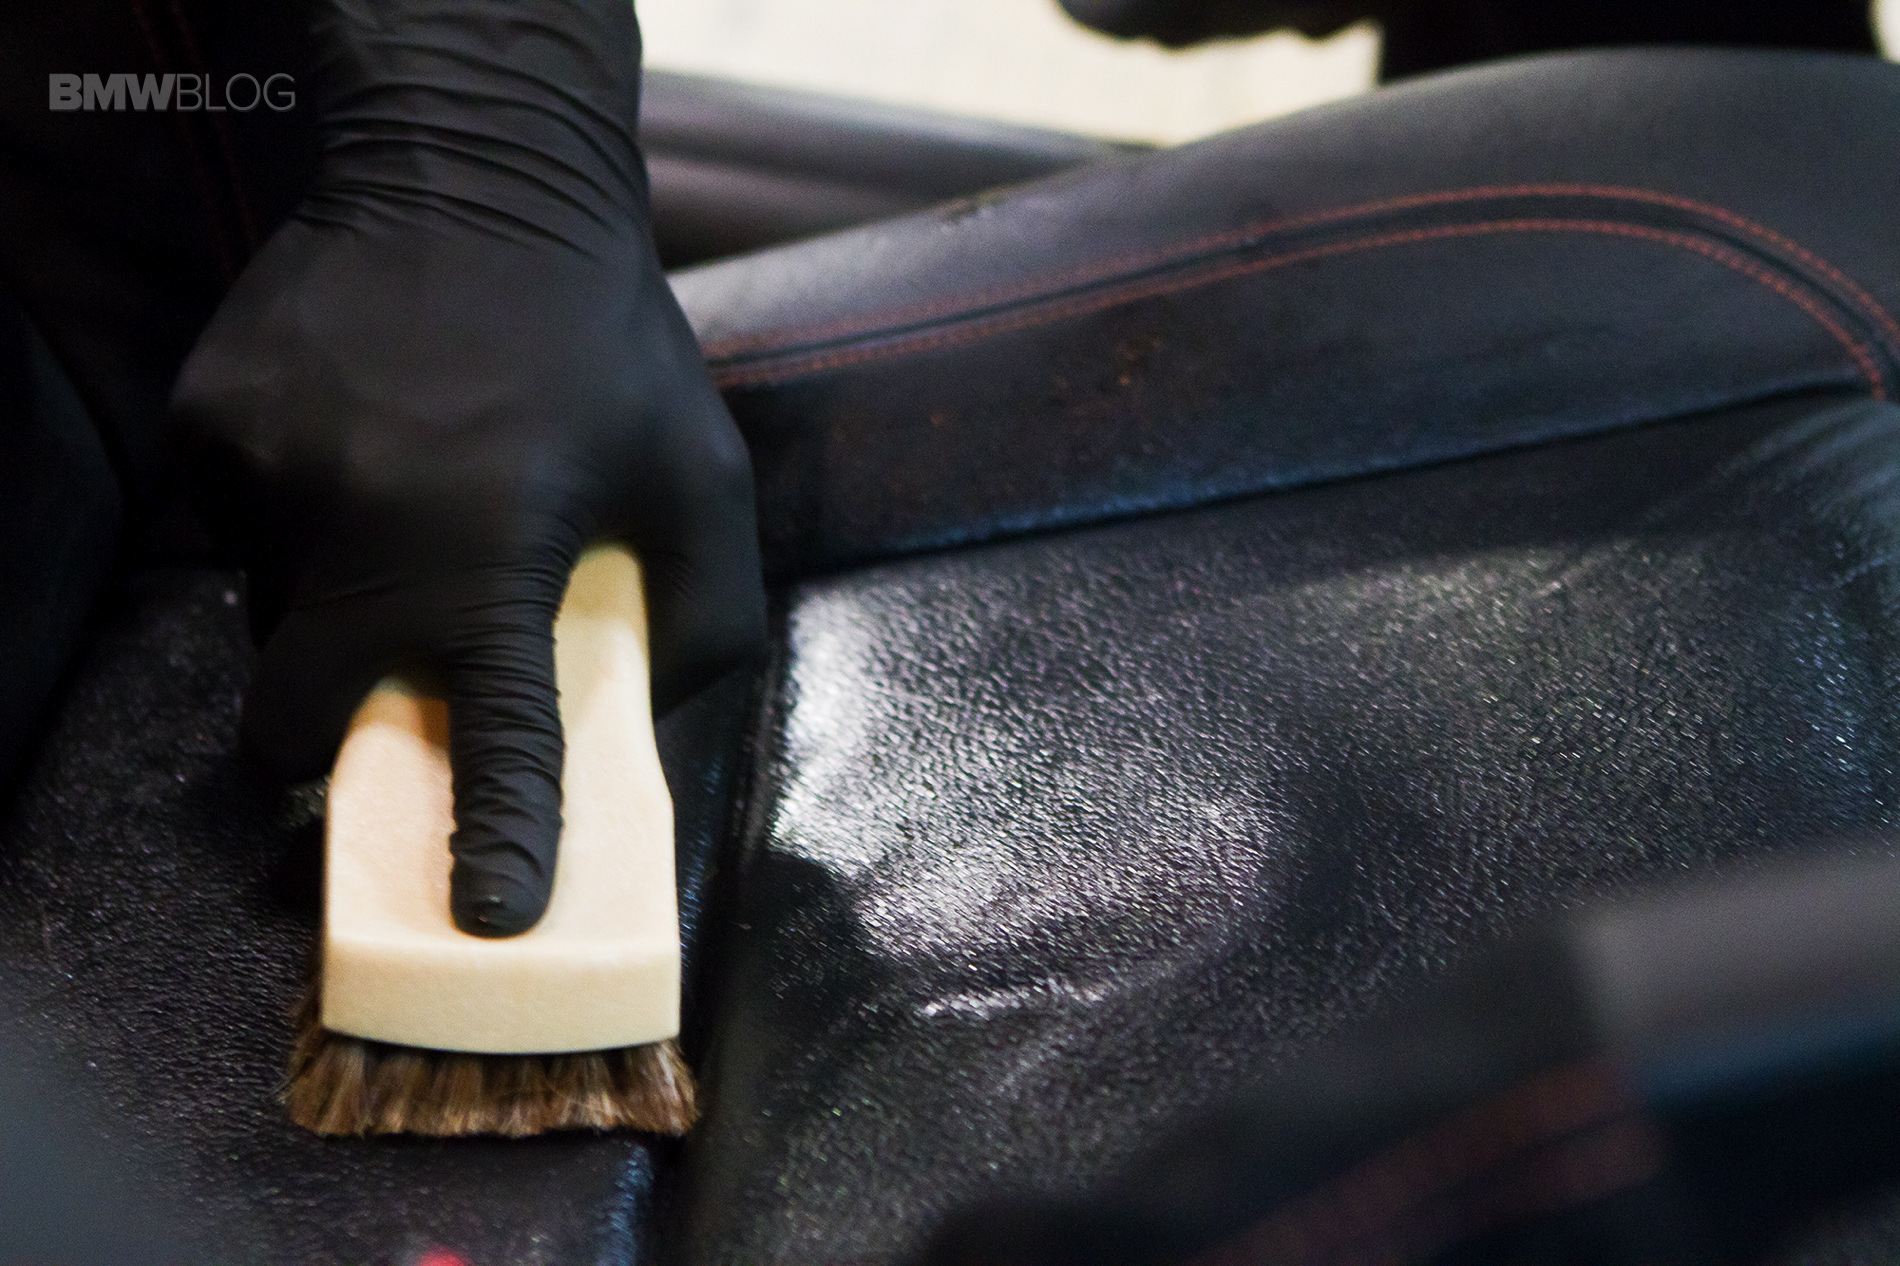
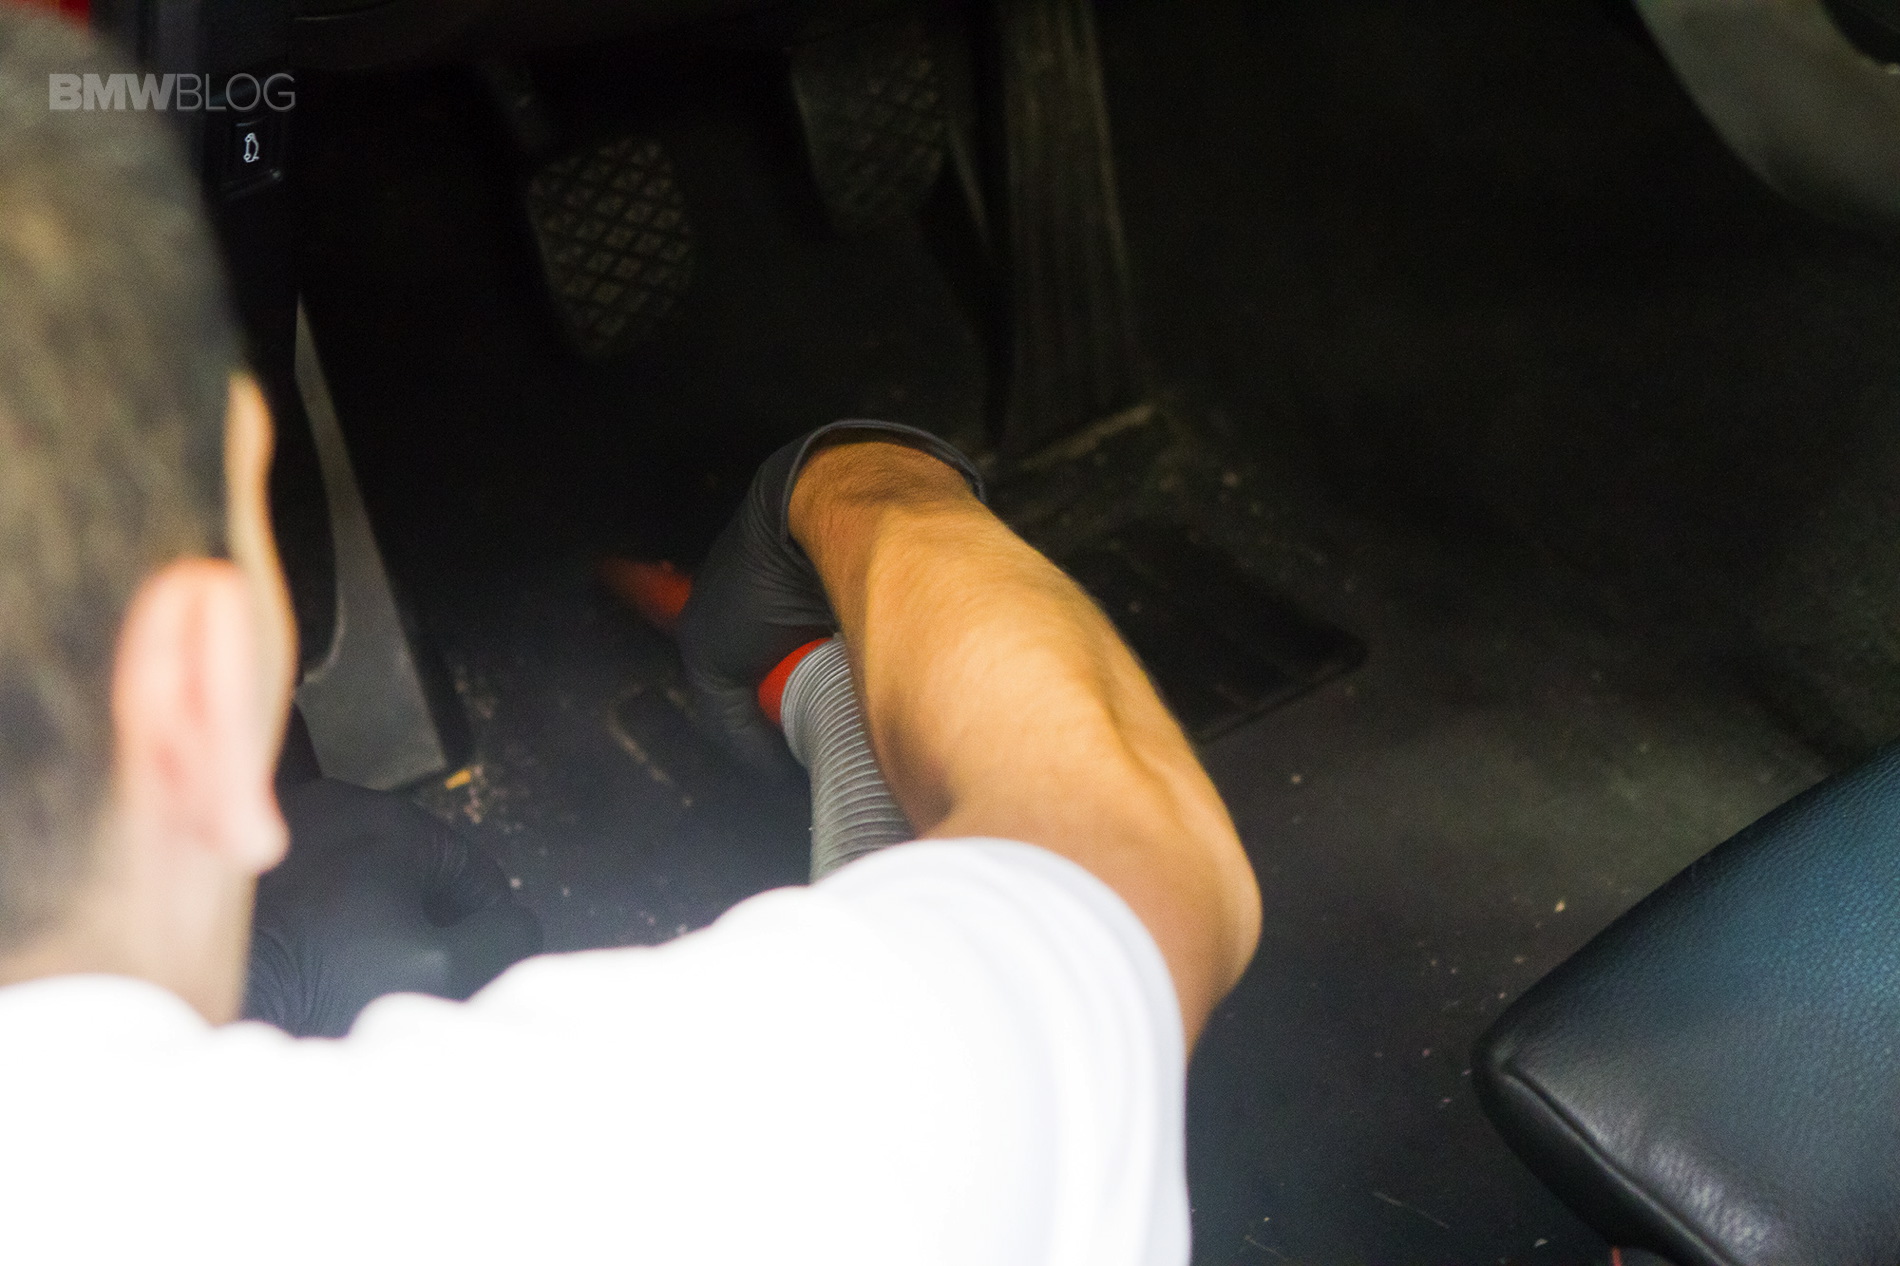
To begin with the interior you’ll need vacuum and dust the whole car. Using a towel to wipe the surfaces and detail brushes to get in and out of vents. This will remove many of the larger contaminants and obstacles.
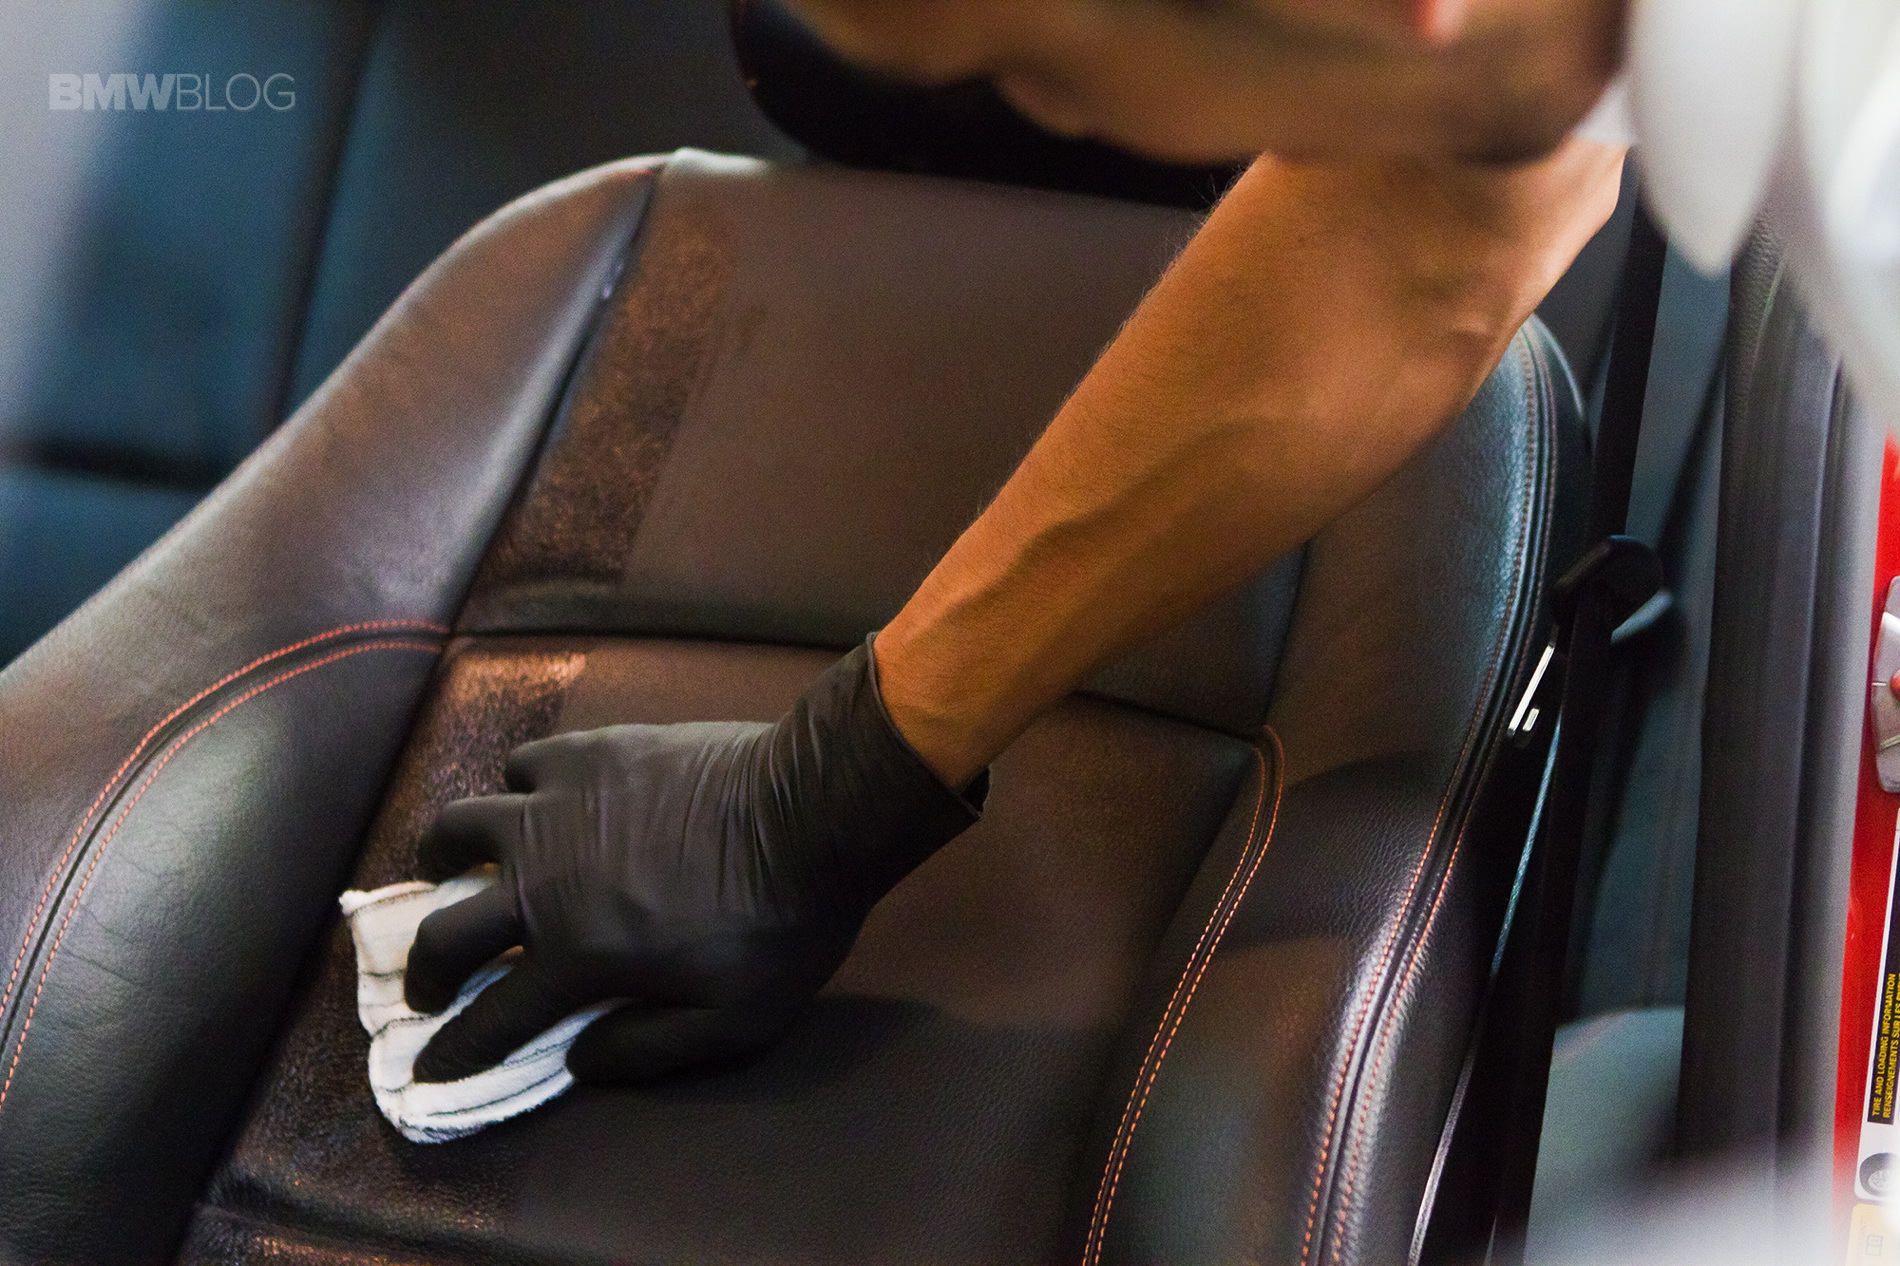
Before you start reaching for chemicals to clean, inspect the type of surfaces you have. Each surface has unique properties and requires a dedicated product. What upholstery needs to be cleaned is not the same as leather or plastic. By choosing a products based on the type of surface and the type of stain (organic or inorganic), you’ll be more effective and efficient with your cleaning. The alternative would be to douse your car with an all-purpose cleaner. And that’ll be ok at cleaning most things, but never really good at cleaning anything.
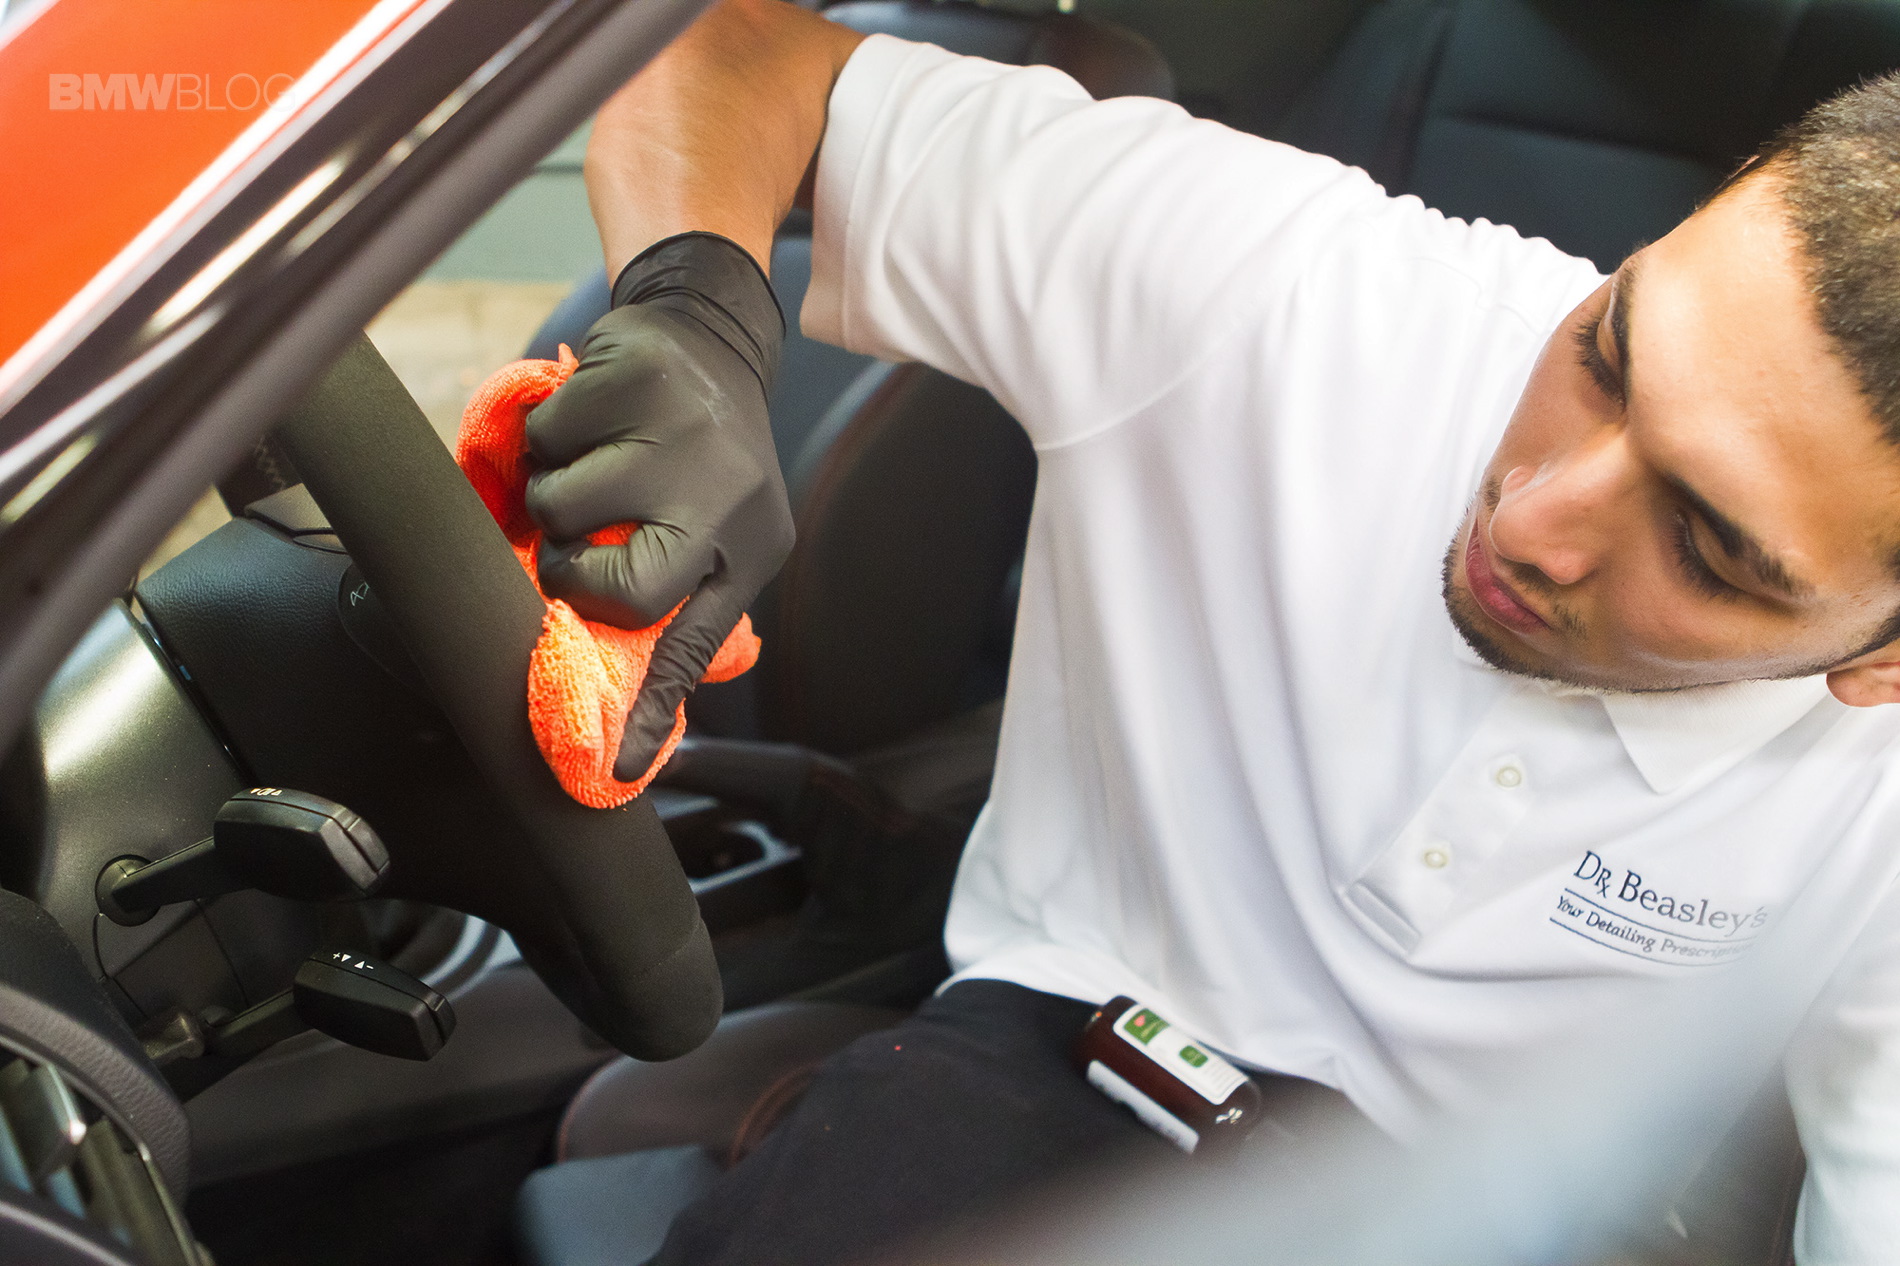
For the BMW M1, we had leather, carpet, plastic, and Alcantara. Because this car wasn’t particularly soiled anywhere, all we had to do was take an organic cleaner and lightly go over each surface. This will remove things like body oils, dirt, and other contaminants that naturally occur.
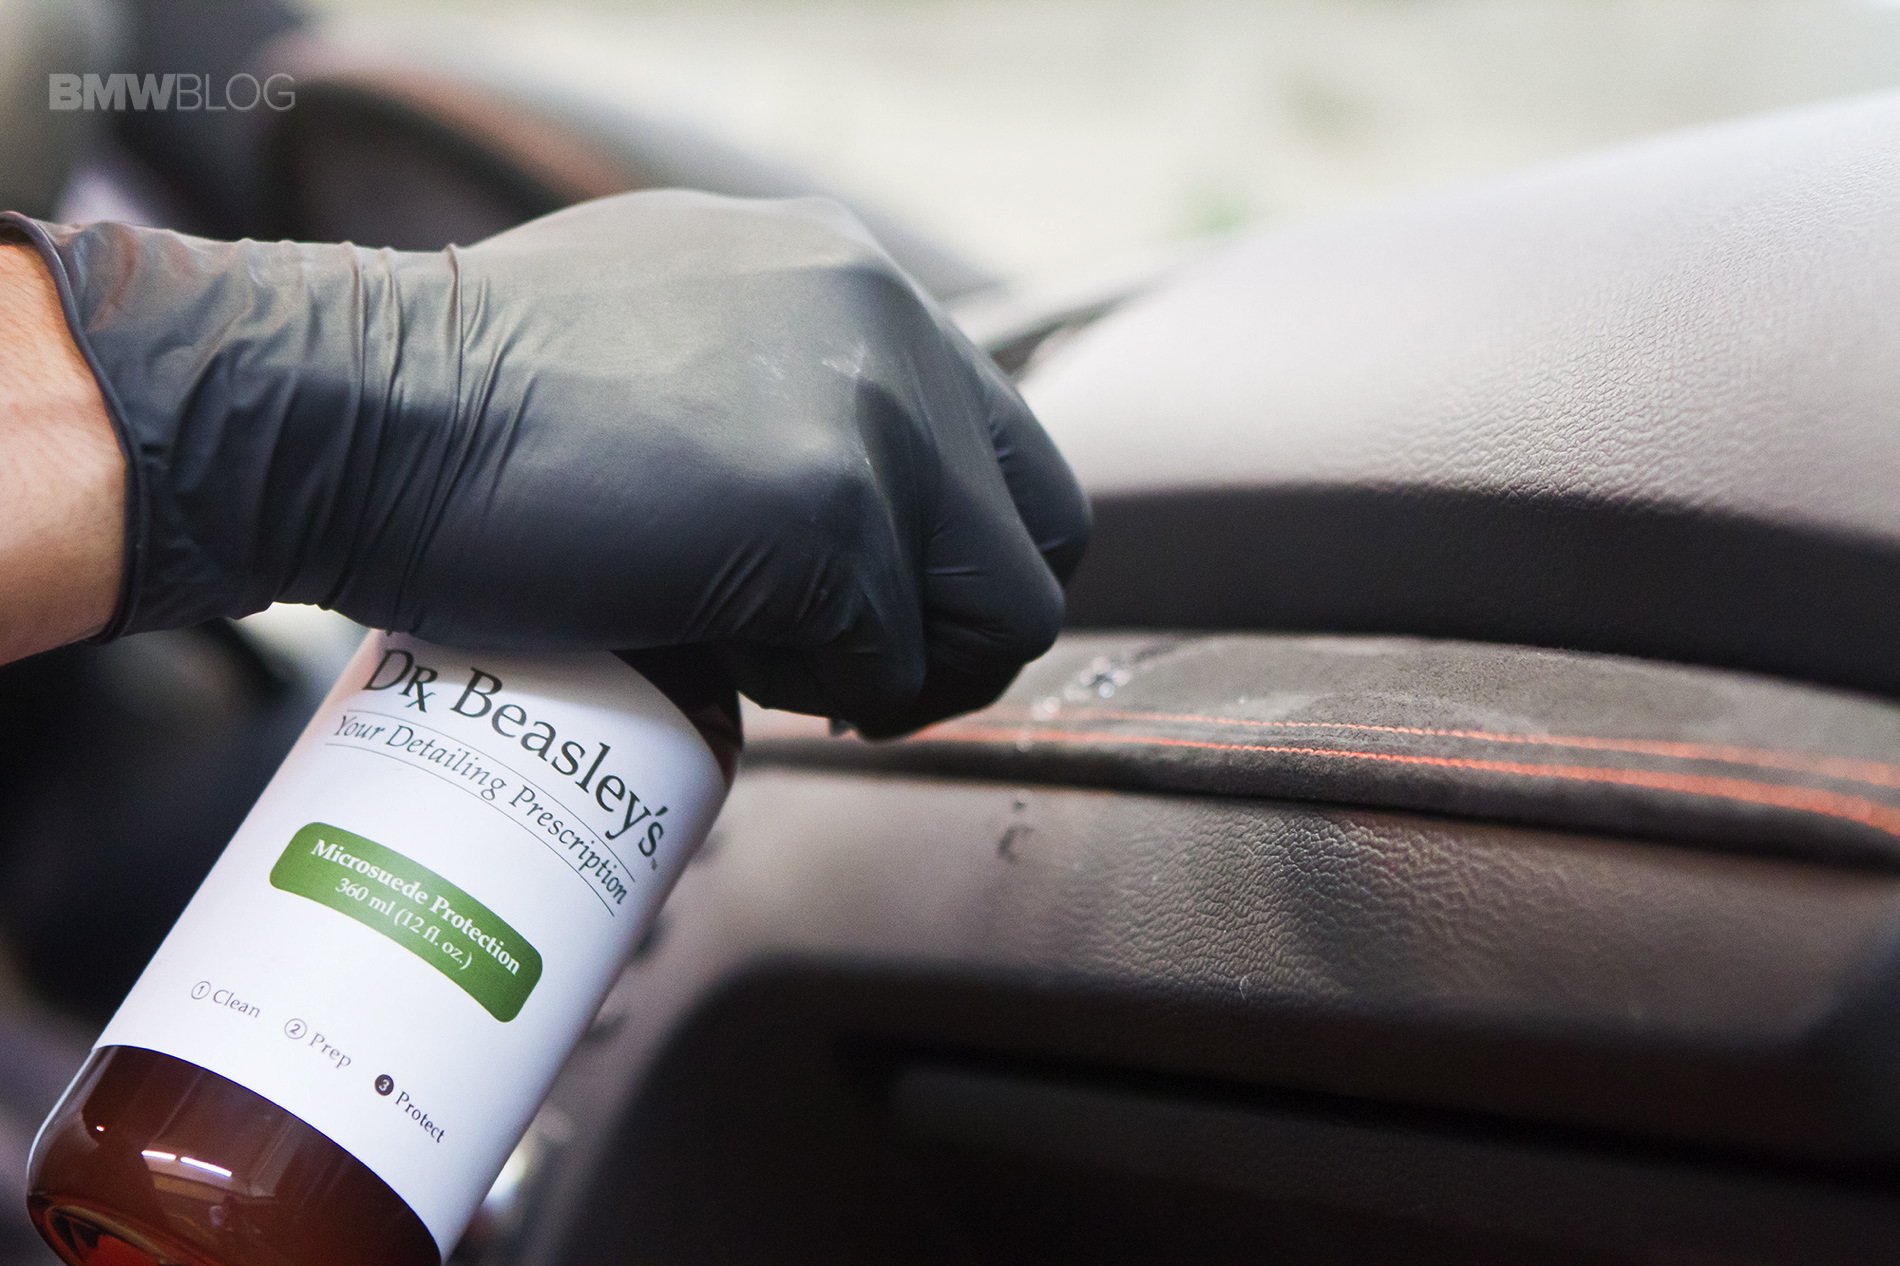
Conditioning and Protecting Interior Surfaces
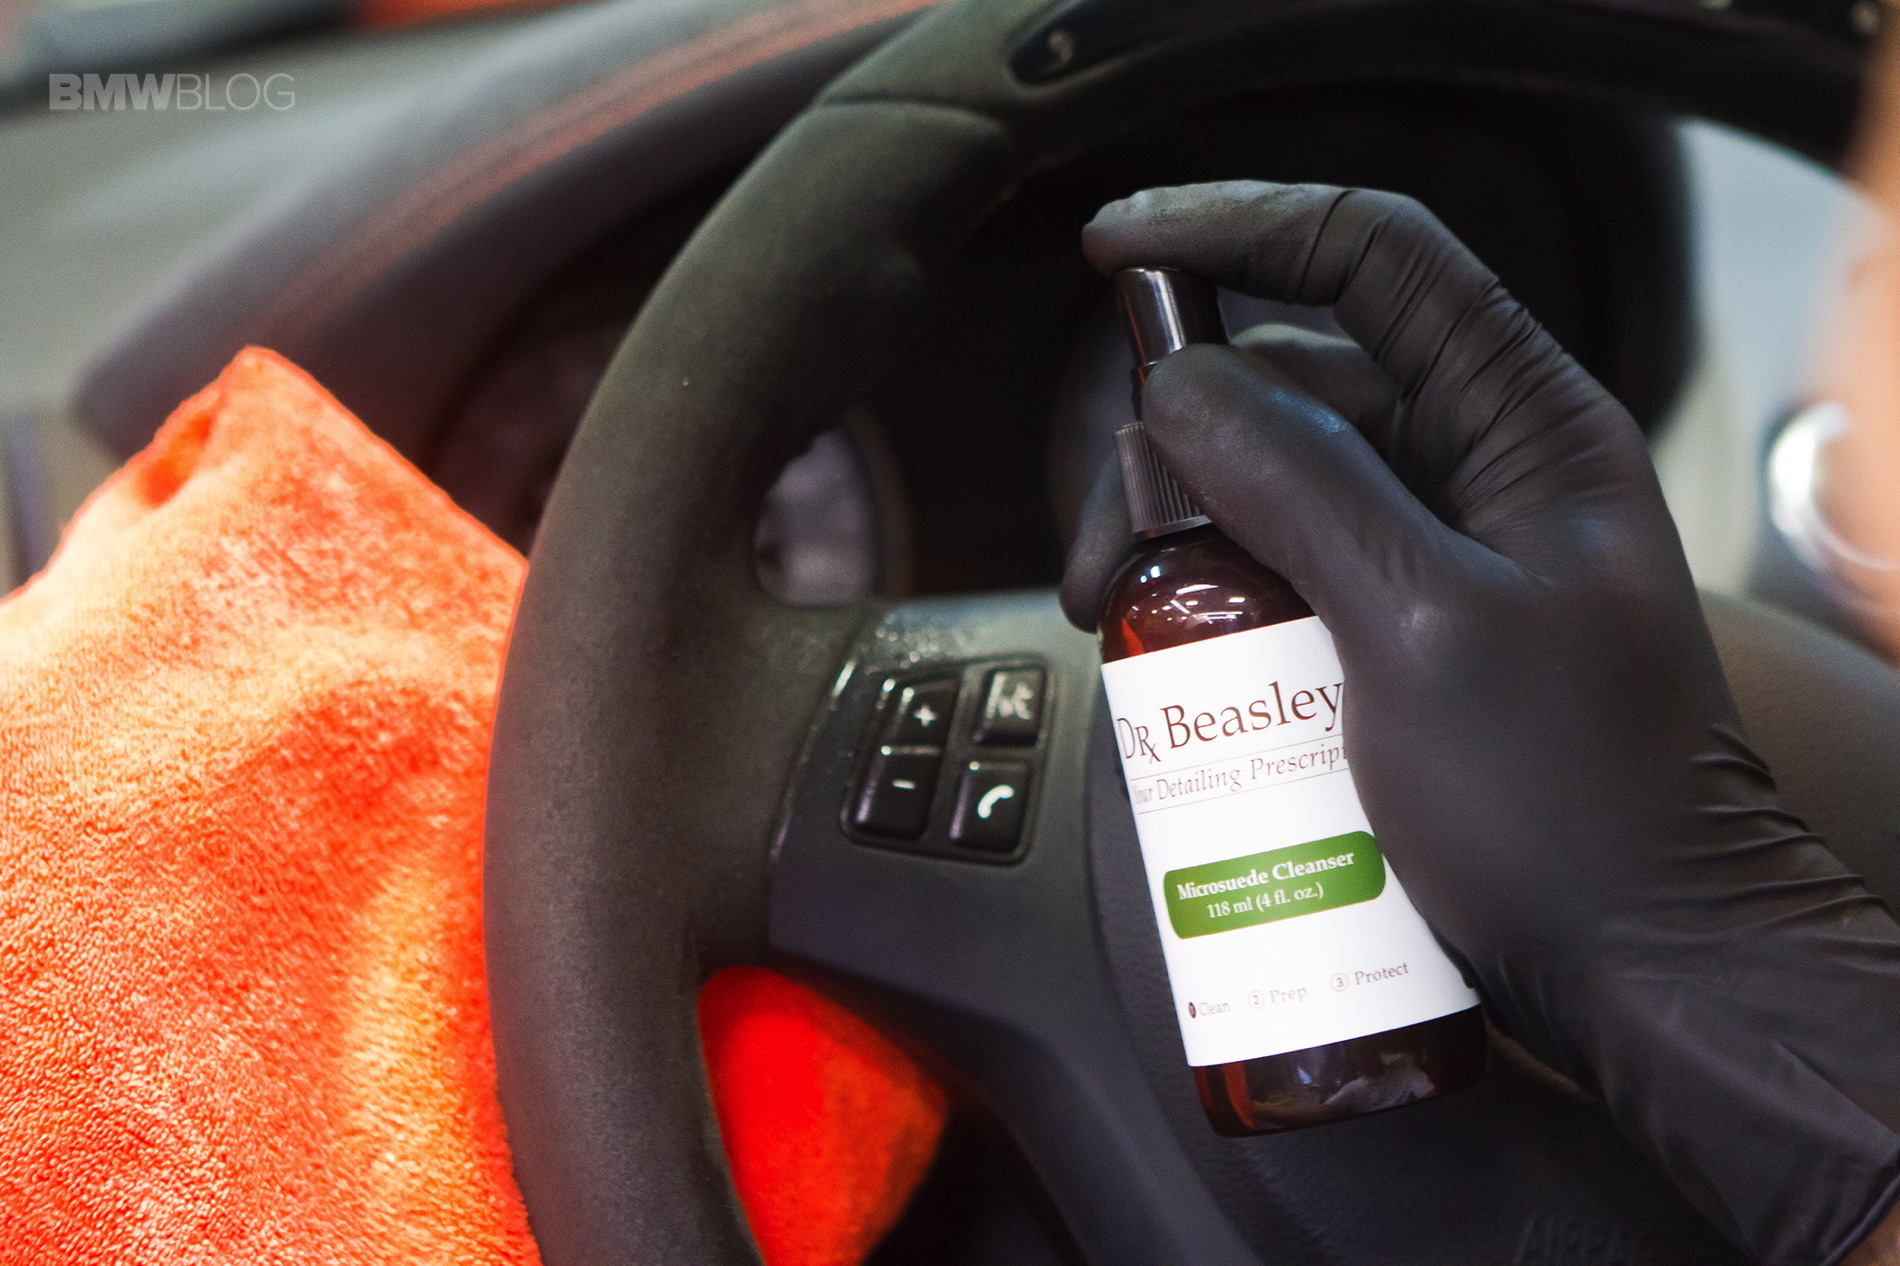
Conditioning interior surfaces of the car is a vital part of detailing. For the 1M, we needed to condition the leather and the plastic. While the plastic dash is subject to UV damage and fading, the leather is prone to drying out and cracking. Leather, like your skin, needs to be moisturized and given nutrients to remain looking new.
We applied three thin layers of Leather Cream and Plastic Conditioner to their respective surfaces. This increases absorption rate while minimizing waste and potential electronic damage.
The name of the game when it comes to detailing though, like the outside of the car, is protection. It’s vital to protect every surface in the car so that they are resistant to staining, UV damage, and even abrasion, which makes them easier to clean. We went through and protected the leather with Leather Lock, the carpet with Carpet and Upholstery Protection, and the Alcantara with Microsuede Protection.
Wrapping it Up

So this is how we took a BMW 1M in fairly good condition and brought it back to showroom quality. While each and every technique wasn’t included, each step was to show how a professional detailer would go about cleaning, inspecting, correcting, and protecting a car’s interior and exterior.
Maintaining a regular wash and detail schedule is the primary way to maintain a fresh, new looking car from the inside out. While there can be some technical skills involved in removing swirls and scratches from paint, you can still be your own detailer at home. Start with the products and the accessories, then clean, prep, and protect your car’s surfaces. Then when you get out there next time, all you have to do is a little maintenance and upkeep.
Thank you for taking the time to read our step by step guide to detailing a BMW. For more information and tips, visit our blog, Behind the Detail sponsored by Dr. Beasley’s.
If you have any questions or concerns, you’re more than welcome to reach out to us on Facebook, Instagram, and Twitter: @drbeasleys.


The BMW 1M detailing work was performed at the Simon’s Shine Shop in Chicago.